Today is my husband’s birthday and his favourite dessert in the world is cappuccino cheesecake so I of course had to make one for him! There have been many years that he has been away on his birthday but this year he was home and I really wanted to make it special. He said this was not only the best cheesecake he had ever eaten, it was the best cheesecake in the entire world! Woah! That blew me away. He is the King of Cheesecakes!
I have had many cheesecake disasters so taking on cheesecake for this important day was a huge risk. From cracked tops to gooey-uncooked centres… I turned to Anna Olson for guidance. The filling is what I was most worried about so I used her Irish Cream Cheesecake filling recipe but added some high quality instant espresso powder to the Baileys to give it that cappuccino flavour.
When you make a cheesecake, you need make it the day before an event. Do not make a cheesecake the day of a celebration. Cheesecakes need to sit, cool and set for a long, long time. They are supposed to be chilled so please, do yourself a favour and make it the day before a party. I speak from experience!
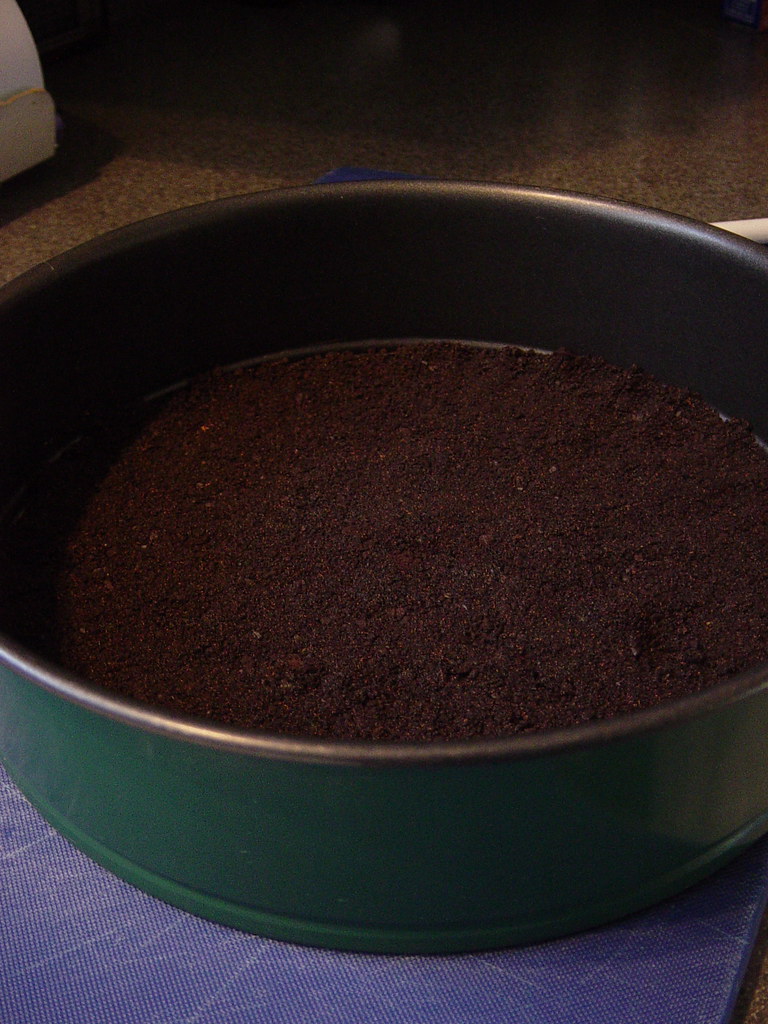
The day before my husband’s birthday get together I mixed together 1 cup of chocolate cookie crumbs (you can make these in the food processor but I buy them to save time), 2 tbsp of melted butter and 1 tsp of instant espresso powder. I put the mixture in the bottom of my 9″ springform cheesecake pan and press down so the entire bottom is covered. Bake at 350F for 10 minutes.

This cheesecake uses ganache for part of the filling so this is actually a very “mocha” flavoured cheesecake too. To make a ganache you chop up 6 oz of semisweet chocolate and cover with 2 cups of hot whipping cream. The cream should be not be simmering but should be quite warm so it can melt the chocolate. Let it sit for a while and then with a whisk stir it up until the chocolate melts. If it turns out your cream is not hot enough, I thought mine was but it was taking too long to come together, set the microwave to 50% power and let it warm up for 20 seconds. This brought mine together.
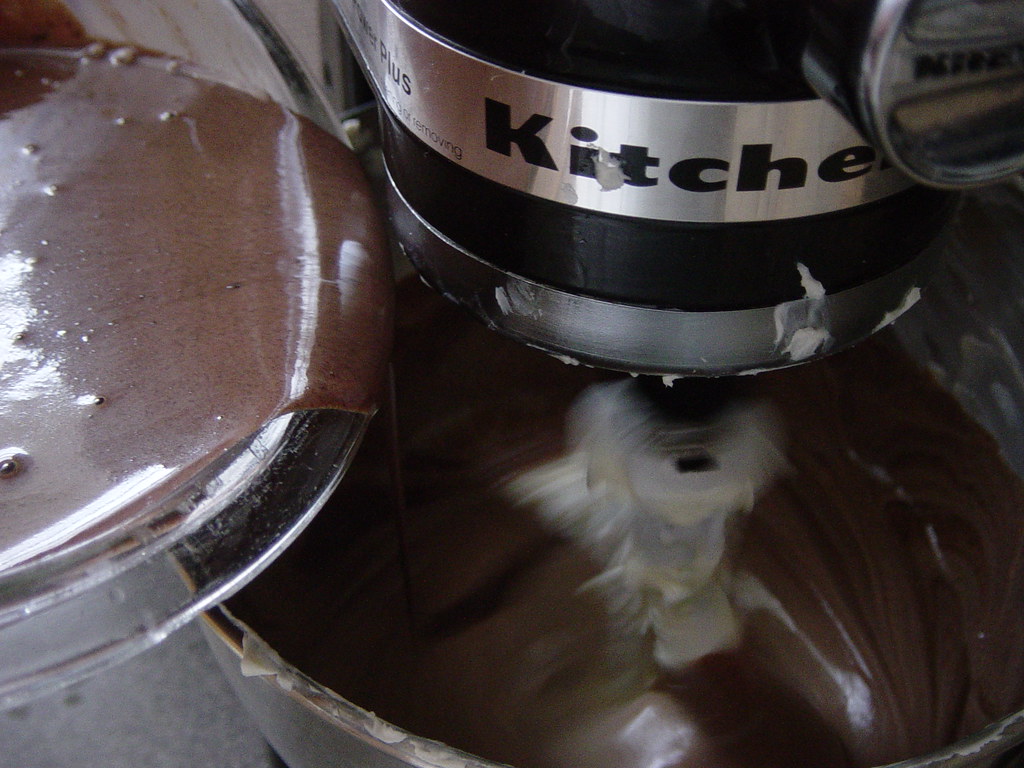
I left two 250 gram packages of cream cheese out all day to make sure they would be at room temperature. This is very important! You do not want a lumpy cheesecake and that is what will happen if you do not scrape down the side. I have made that disaster cheesecake as well, not appetizing. Beat the cream cheese in a mixer with the paddle attachment or process, I have successfully made a cheesecake in the food processor before, and regularly scrape down the sides. Do this over and over again. You want the texture to be nice and creamy before adding anything else.
When it finally looks creamy and easy to work with, gradually add 3/4 cup of sugar and again, scrape down the sides. Get everything incorporated. Beat in 1 tbsp of cornstarch and then 1/2 cup of Irish Cream with 1 tsp of espresso powder in it. Scrape down the sides. One at a time add 2 large room temperature eggs to the batter, make sure they each get completely incorporated. I know it is annoying but keep stopping and scraping down those sides until everything is completely blended. Then pour in the ganache and, yes, that’s right, scrape down the sides. It is going to look really fluid and at this point my heart filled with dread but I put it in the oven with my fingers crossed. Well no, not literally but they were crossed symbolically.
Bake in a preheated 325F oven for 30 minutes then turn off the oven and leave it in there for 30 minutes. It is important to not open the oven during this part of the process at all! After the hour has passed then you remove the cake, let cool to room temperature and then it sit in the fridge overnight.
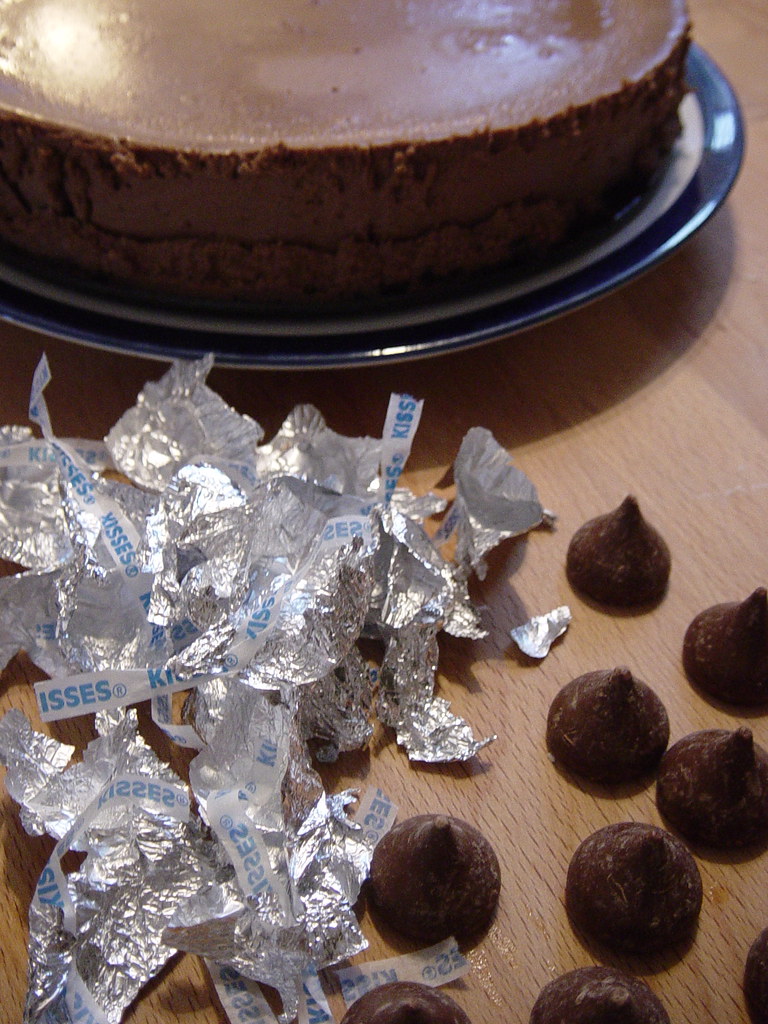
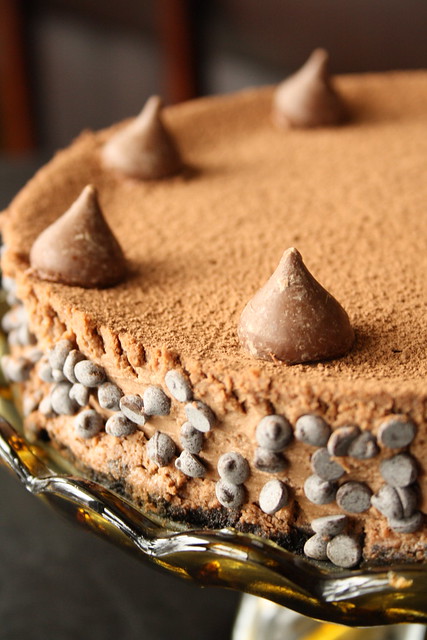
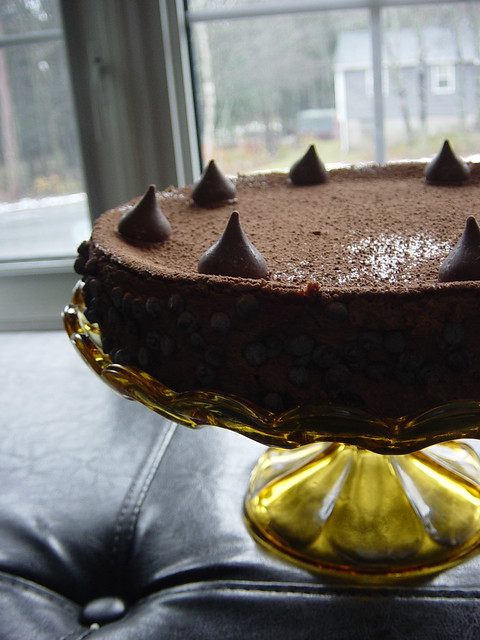
Then comes the fun part, decorating! I wanted to put chocolate covered espresso beans along the top but I could not find any so I choose to use Hershey’s Kisses instead. First I got mini chocolate chips and pressed them into the sides of the cake which was messy to do but I liked the look. I sprinkled cocoa powder all over the top with a sieve and then put a little bit of icing on the bottom of each kiss and attached it to the top of the cake.
This cheesecake is a total winner. It did not crack on the top. In just an hour in a cool oven it did bake all the way through. Silky, light, almost like chocolate mouse, this cappuccino cheesecake melted on the tongue. There are not many recipes out there I will make again and again but you can bet that this time next year I will be making this cheesecake again.
[yumprint-recipe id=’187′]


That is love right there! It looks devine! I only make pumnpkin cheesecake but I should branch out really shouldn’t i?
That looks great!! Happy birthday to your husband. 🙂
You can tell from the photos how deliciously light and smooth it is! Many happy returns to your husband!
Well done! It looks amazing!
Birthday wishes to your sweetie:)
I can no longer eat sugar because of my glucose level, but if I ever could, THIS is what I would have. THIS! Kudos, Suzi, xo, O
This cheesecake looks perfect! I’m bookmarking this one for sure!
This looks yummy. I know your husband enjoyed his birthday cake.
Wow what a beautiful job you did, I’m really impressed!
Looks and sounds delicious!
Absolutely beautiful – and I’m sure it’s even more delicious! What an awesome treat for a wonderful guy.
All I can say is WOW…
Happy birthday to your lucky husband, and congrats on top 9!
wow, that looks fabulous and i absolutely lOVE your pics!
what a delicous, beautiful and desering thing!
congrats, that’s art!
This looks great…the photos are amazing
thank you for this recipe. my adaptation came out very well, was a great hit.
Hi, I was just wondering how many grams each of your tubs of cheese were? I bought 2x 250 but im not sure if that will be enough for the recipe :S
thx
Rhathaway, the recipe calls for one pound of cream cheese which is 450 grams so you definitely have enough.
This is late for help for me but, you did not specify the pan size, I used 9 1/2″ and the liquid was to the top. Should I have used the bigger size? Should I bake it for longer?
Rooter, my pan is 9″ and so is the original recipe so you should be fine, I think if anything it would bake faster. I hope it went well!