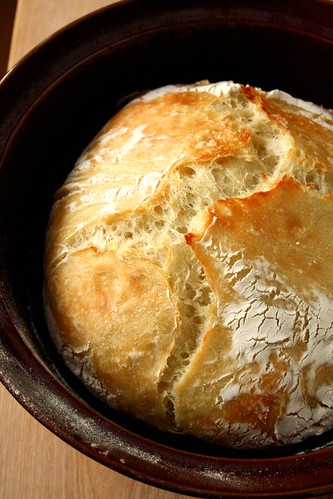
I am starting the week with my best foot forward. Thank goodness I made Anna’s Rustic No-Knead Artisan Bread last week or else I would have had a meltdown. I had so many things go wrong in the kitchen last week that it is nice that I have one success to share with you. Yes, I will also share my disasters with you but not today.
I want to start the week optimistically and how can you not be happy looking at this beautiful loaf of bread?! I will let you know that the day I made this was the day I also realized that my breadmaker might be dead. I could weep! But I am not going to, right? I am going to focus on the positive. Yeah, I am so good at that… <—–insert sarcastic tone. You can find Anna’s recipe here.

I got out the hugest bowl in the world for making this bread. I do not like mess so in it I placed 3 cups flour, 1 1/2 tsp salt and 1/4 tsp yeast. I mixed it together with a wooden spoon.
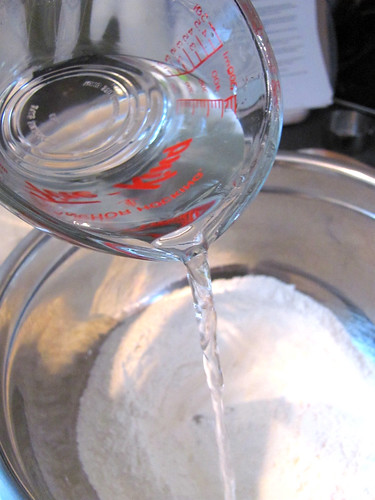
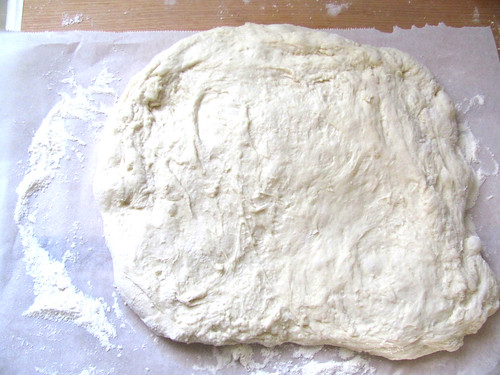
I poured in 1 1/2 cup water. Now Anna does not indicate what the temperature should be so I added lukewarm water, just to be safe. I mixed it together with my wooden spoon until it just came together. I did have to add a lot of extra water though, Nova Scotia is so bloody dry in the winter!
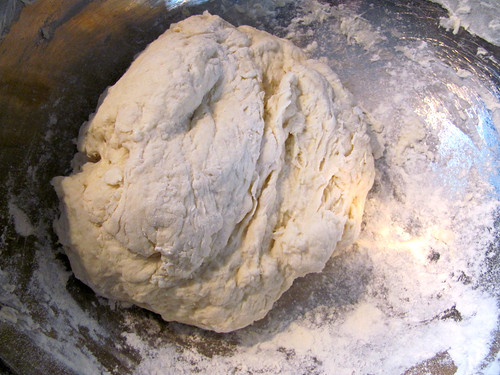
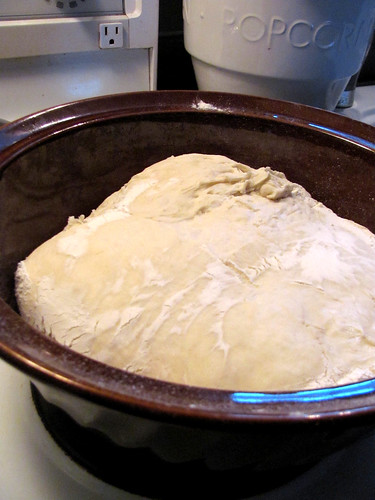
The dough kind of came together so I stopped. No kneading, no work of any kind. I did move it to a smaller and cleaner bowl though and let it rise until the next day. Anna says it should have stringy texture and boy, did it ever! Make sure to cover with plastic wrap so it does not dry out.
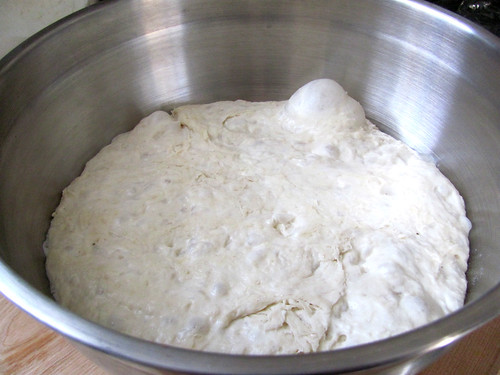
Look at that giant bubble at the back!!! So cool. Man, baking can be such fun.
On a piece of floured parchment stretch the dough out until it is around 10″ x 10″. It will be sticky so flour your hands!
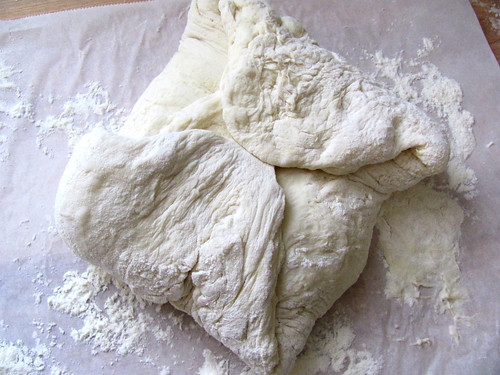
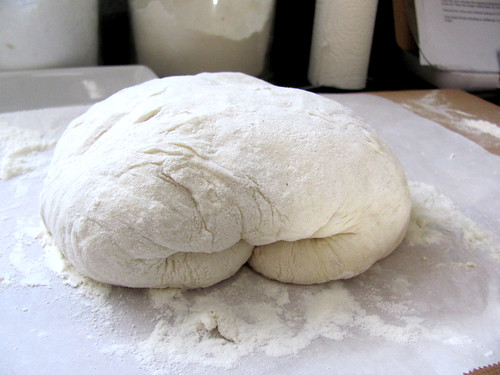
Pull the corners together and flip over. From here I also used my hands to make it more round. Wrap the parchment around the dough and cover with a clean tea towel and let rise two more hours. Yes, this recipe does take some time!
This is where I got into some trouble. I did not realize it require a cast iron Dutch oven until I got to this point. Yes, I am terrible at reading ahead, I know. I put my Paula Deen Casserole Dish in my oven and turned the temperature up to 400F, not 500F. I am pretty sure this dish can not handle such a high temperature but knew it could handle 400F.
When the oven was preheated I took the dish out of the oven, took off the lid and put the dough in folded sides up. Well that is what I was supposed to do but I can not tell if I did from this photo. I am pretty sure I did and then baked for 35 minutes (a little longer to make up for the lower temp). I removed the cover and baked at 350F for 15 more minutes.
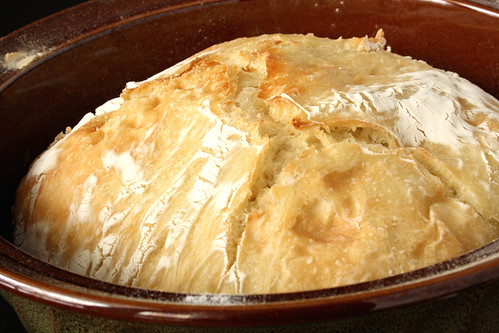
Seriously, what a thing of beauty! And I did not have to hurt my hands to make it, I just had to wait FOREVER! Was it worth it? Absolutely!
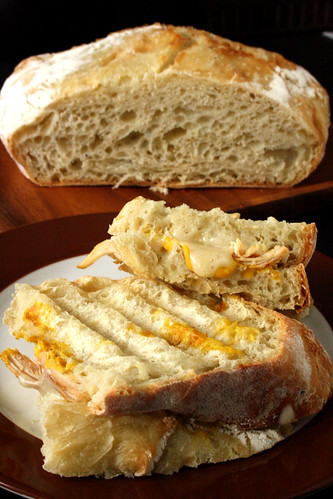
This bread made amazing paninis like the chicken and Havarti photographed above and made some of the best toast I have ever had! The bread is filled with these bubbles and as a result reminded me of a crumpet when I had it for breakfast with my wild blueberry freezer jam.
I love it when a recipe is really worth either the time or the effort (or both). This loaf of bread really does look and taste like the kind you get at fancy bakeries. The crust has fabulous texture and the bread stunning flavour. I do not recommend it for garlic bread but for just about everything else, I bet it would be perfect. Anna, I give your recipe five out of five wooden spoons!


What a fabulous looking loaf of bread!
I love making bread. Yours turned out beautiful. Most be nice of a cold day.
Susie, fantastic bread! I always love how you explain things so clearly. Once again,thanks a million for tagging my post. Just posted the focaccia version we talked about,and….. eureka! I managed to insert a link to your site. Will wonders ever cease? Maybe there is hope for this tech challenged person.LOL
Thanks everyone! It is such a pretty bread, love it! Thanks Anna, I was hoping I shared how to make this bread clearly. You are very welcome and dang, that focaccia looks stunning! I added the link to my post. You can totally do it Anna, you are doing fantastic and maybe one day you will have your own FB group?! 😉 You can totally do this.
Thanks Suzie and Anna for the inspiration and the fabulous tutorials on breadmaking. I was supposed to make it this weekend but ran out of time, will definitely make it soon though. Looks incredibly delicious.
Since I don’t have a cast iron dutch oven either, I did a little research on this recipe and basically any covered vessel that can handle the heat is just fine. So Suzie, your PD casserole dish is a perfect choice. Apparently you can also use ceramic, pyrex, enamel etc…as long as it is oven safe for the high temperature.
That’s OK Ava, hopefully you will find the time to make it soon. Oh good, glad I did it properly! 🙂 I wonder about old fashion cast iron that isn’t enamelled?
I am making this over the weekend – it looks absolutely amazing. Thank you so much for sharing this!
Hello, I stopped by from Anna’s site…You have a great site here as well and this bread plus your tutorial are just fantastic 🙂
What size dutch oven do you use? 4,5 or 6 quart?
Hello there Anna,
Polly Motzko here from Southern CA from Cooking UP A Storm All Over The World!
I found you on Twitter as I am there under my nickname of “Polly Motzko”.
I just created a segment called BREAD STARS on my site and would love you to check it out.
I love your blog here and will tell my chef buddies and foodie friends about it too.
I am on Facebook, under my full name:
Paulette Le Pore Motzko
As me to be your friend there. 🙂
Happy Baking to ya!
I would love to invite you to the all new Bread Stars:
http://cookingupastorminca.ning.com/page/attention-all-the-bread-stars
Wow! So great to meet new people and to hear people will be trying this recipe out. Makes me happy. Polly, thanks for the invite, I sent out a friend request at FB and am honoured you would include me in your bread stars!
When I first read about no-knead bread I was like, WOW! I want to try this! Then I realized that I don’t seem to have the right vessel for it to bake in. But, I really do want to try this some time soon! 😀
boobookitty, that happened to me too! I didn’t have a cast iron Dutch oven which is why I used my casserole dish. You just need to find a covered vessel and maybe not bake it as high. I lowered my oven and it still turned out great! I hope you figure out a way to make it happen.
Interestingly enough, this article popped up on Dutch Ovens! I’m not sure just how big the Ikea one is, but at the price of ~$40 versus the arm-and-a-leg for a Le Creuset one, I think it’s almost worth trying it out! 🙂
Le Creuset is good but not THAT good for the price. Tried several cheaper alternatives from Own Brand kitchen shops, all good. May not be so good in 100 years time, but how long do you expect to live??!!
I got a cast iron Dutch oven since this post from Kitchen Stuff Plus and it was under $100 with free shipping and is still going strong. As much as I would love Le Creuset, it’s just too much money and I heard they make them in China now so the quality may be just as good as the one I have.
Oops! I forgot to include the link for the article I was referring to!
http://marketplace.apartmenttherapy.com/features/dutch-ovens-high-and-low
🙂
boobookitty, that is a great article and I don’t think I will ever be able to afford to get one of those beautiful Le Creuset Dutch ovens which is why I got this casserole dish instead. But! You can not cook these cheaper dishes on the stovetop and then put them in the oven. They are oven-only which in the end is no big deal. I just cook on the stovetop in a stainless steel pot and then transfer it to a casserole dish. Works for me and is a fraction of the cost. Thanks for writing and sharing that article!
We use a enameled cast iron Dutch oven from Costco. It is just like the $230 le cruset but only $50 new.
I have been cooking since I was 11…that’s 58 years, but I have never made bread. It is something I want to do now, and have been looking for recipes. This looks like a good recipe to start with. I have just started following you blog. Patsy, in Texas
Wow Patsy, comments like your keep me blogging! I hope you have so much success with this recipe that you get hooked on bread making too. 🙂 Nice to meet you and let me know how it turns out!
Just took my loaf out of the oven! Many thanks for sharing the recipe.
Wonderful Valerie! So glad you made it and it’s my pleasure.
complimenti per il tuo bellissimo blog! da oggi ti seguirò 🙂 baci!
Vi ringrazio tanto! Sono felice di aiutarvi e vi ringrazio per il supporto!…
I hope the translator worked! Thank you so much! 🙂
That is some gorgeous bread!!!
Hi, would love to try making this bread, it looks amazing. What type of yeast, can I use instant or quick rise yeast?
Anonymous, I would not use instant rise, I would use a traditional regular yeast since it has to sit overnight. Good luck and yes, it is amazing!
This comment has been removed by the author.
is it Ok if I baked without using a pot?
No need to take the dough off the parchment paper…just lift it and drop into the dutch oven and then put the lid back on. Some parchment paper can hang out from beneath the lid. I did this after preheating the dutch oven to 500 degrees. The paper turns brown and crisp but doesn’t burn and doesn’t stick to the dough. The dough I make is sticky and hard to handle so this really helps.
I am very glad I came to your site as I didn’t have a dutch oven either. I also do not have such a casserole as you show. SO, I will use the crock liner from my Slow Cooker along with it’s lid. I believe that it can withstand the same heat recommendations that you gave for your casserole. With all the positive comments, I feel I will have success with this bread. I don’t ever make bread by hand anymore because I am spoiled to my bread machine, since it is only me now and that is usually just so simple! But, I believe for a treat, I will be making this bread often. Thanks! I enjoy your site very much.
Linda, I have been meaning to try making bread in the slow cooker too! I am also totally spoiled because of my bread machine. Thank you! So glad you like the site. 🙂
I wonder if you could put this in the crock pot and let that cook it? No dutch oven required? I may have to try that.
You can always try! The difference here is though that this is super fast and hot and intense baking whereas the slow cooker is the opposite. Whatever happens will be interesting, just not sure you will get the same results.
Do you need to grease your casserole dish at all?
Do you need to grease your casserole dish at all?
No Mindy, I don’t think so. At least I don’t think I did!
Suzie, I have your bread in the oven right now. I added garlic and cheddar cheese to mine. Cooking in a square pyrex pot with a glass top. Used 450 as a temp to start, 30 min. then will turn down to 350 for the last …12-15, I’ll watch it through the window. Can’t wait to see what we get. Thanks!!
sorry, I couldn’t figure out how to add my name…Mike….from WI
I would like to make this with garlic and cheese. Can you tell me how much of each I should use and when do I put it in place?
Lynne, if you are using garlic powder I wouldn’t go above 1 tsp, fresh garlic could probably get away with a couple of minced cloves. Cheese could impact the baking time so just use 1/2 a cup of shredded cheese the first time you make it. Enjoy and great foodie ideas BTW!
Ohhh it looks so good!!! How I wish I could make it gluten free and still look and taste as good as that! 🥺
Thank you Linda!!! Make sure to use oil and not butter if you try and I hope you can come up with a way to make it gluten-free!
I have been using this recipe for at least a year and decided to try the cold oven method and eureka it worked beautifully. I have a convection oven ( but it works in regular oven too) and this is what I do. I follow all the instructions up to the point where I would preheat the oven. Instead of preheating I place the bread on parchment cut to fit and drop it into the pot with lid on and place it in a COLD oven. Set the temperature to 450F….bake it for 35-40 minutes, remove the lid and bake an additional 10 minutes till the internal temperature of the bread reaches 200F.. Amazing bread every single time. Give it a try you won’t be disappointed.