Bagels. I knew that I wanted bagels to be the first thing I accomplished on my Foodie Bucket List. I asked all sorts of people for advice and opinions. A lot of people said they were straight forward but the more I looked into it, the more I realized nobody makes them the same way. I did not find one recipe I wanted to follow exactly so the following is my own creation. Bagels made my way.
The Ingredients
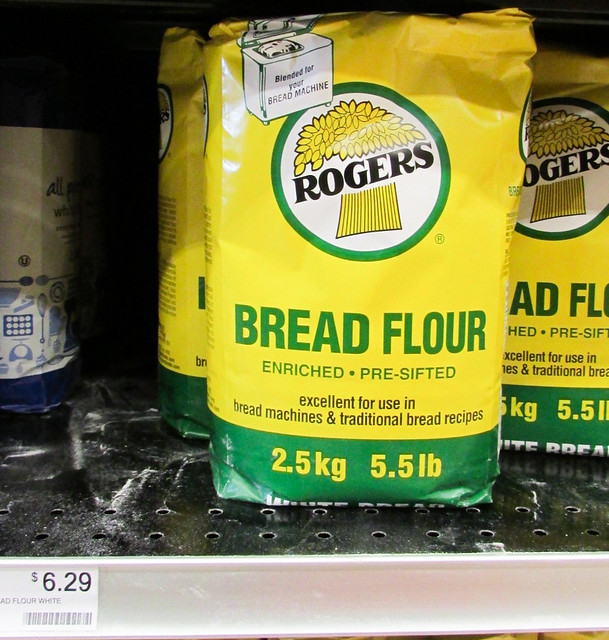
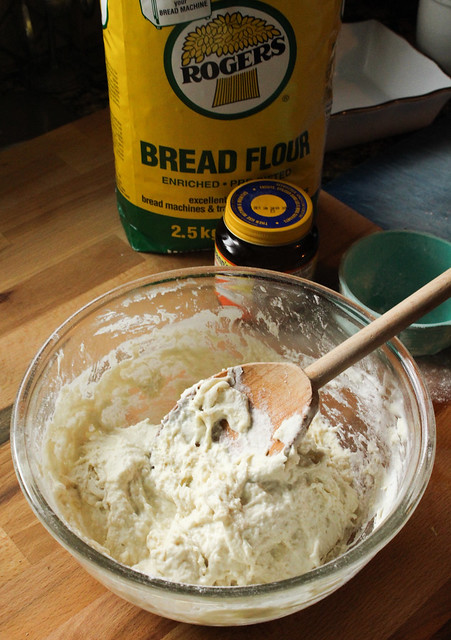
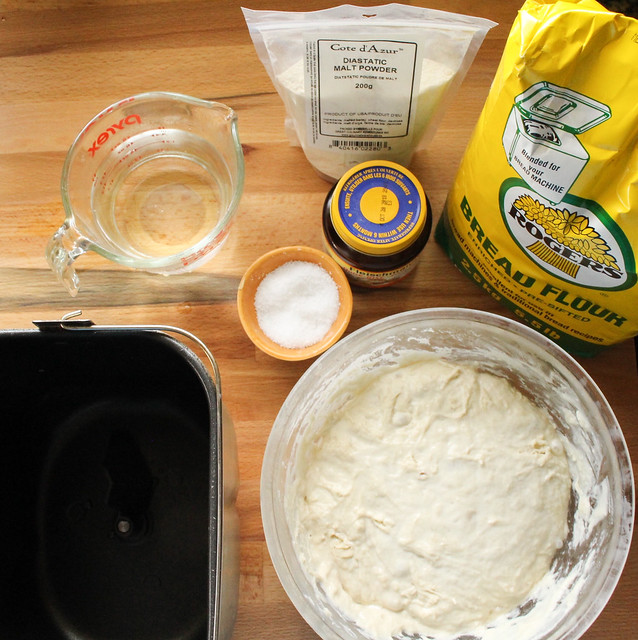
My friend Randal told me about Rogers and their bread flour. After the recent health scare with store-bought flour, I was more than happy to invest in bread flour that was not associated with the recent recall. He also told me that technically Canadian all-purpose flour has higher protein content than American so I could use all-purpose if I wanted to but I wanted to try this product out anyway. More about Rogers coming up on my site!
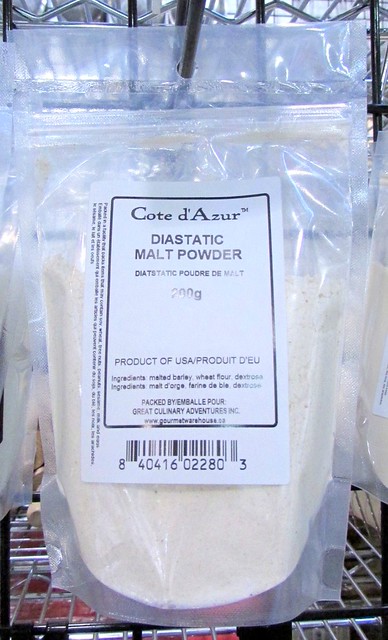
I found out about diastatic malt powder during the investigation part of this process. Turns out that it is considered the secret ingredient because it has sugar breaking active enzymes. It also helps with giving the bagels a strong rise, great texture and lovely brown crust. I picked some up at Gourmet Warehouse for just $4!
The Sponge
Making a sponge starter the day before and letting it slow rise in the fridge is apparently essential for developing the yeast flavour. Slow proofing is key!
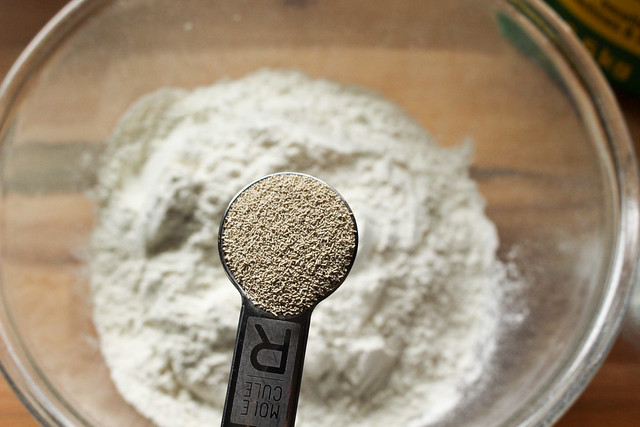
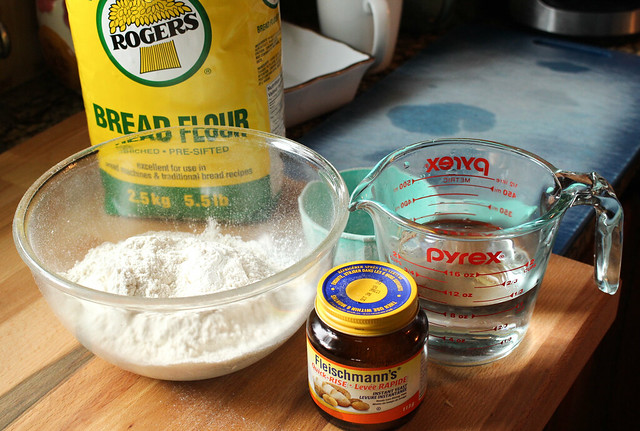
Mix together 2 cups bread flour with 1/2 tsp instant yeast. Add 1 1/4 cup warm water or more if required.
You want a wet yeast base so I actually added a little more water so it would look like this. Cover and put in the fridge and let proof overnight.
The Dough
I was going to make the dough in my KitchenAid mixer but my friend Nigel told me when he went to make bagel dough in his, it started to smoke! This told me two things: 1) No way I was going to make this dough by hand but if you are super strong, go for it 2) It was time to take out my bread maker. It is up to you how you want to make yours. If you are buff and tough, use your hands. If you feel your mixer is tough enough, go for it.
You will need: 3/4 cup warm water, 2 cups bread flour, 1 1/2 tsp salt, 1 tsp malt powder and 1/4 tsp instant yeast.
If you need to add more water to bring the dough together, add more water!
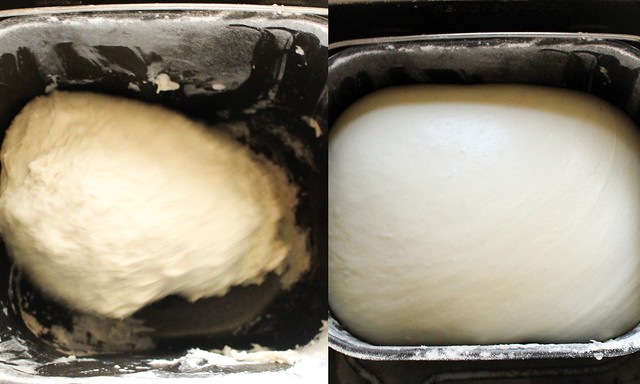
I put everything including the sponge in my bread maker in the order of the ingredients. Then I selected the dough setting. If you are making this via mixer or by hand then let the yeast proof in the warm water with +1 tsp of sugar for five minutes. Mix everything together and knead for 10 minutes. Let rise 90 minutes.
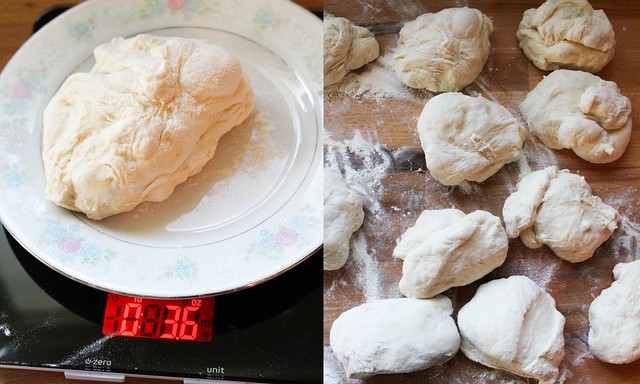
I divvied out the dough into 3.5-ish ounces each and ended up just shy of a dozen.
The Bagel Shaping
Now you can just roll them into a sphere and cut out a hole in the middle but I like this approach. As the chef says, this way people know it is a homemade bagel.

You want to roll out a piece into a strand with tapered ends.
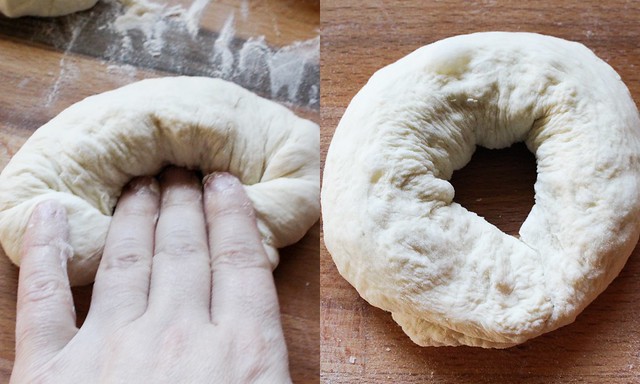
Overlap the ends and then roll your hand through the hole. Not easy but very cool!
The Bagel Boiling
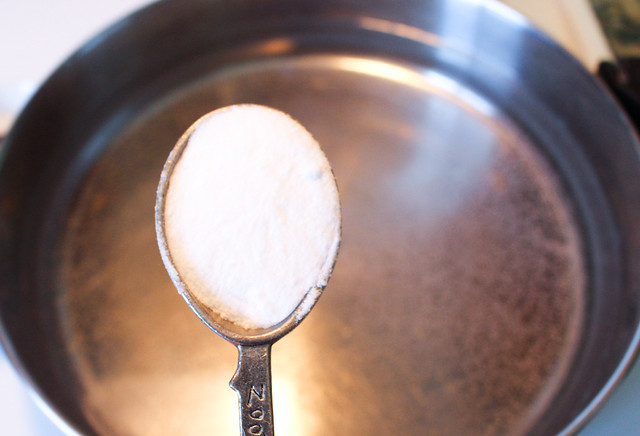
To boil or not to boil? Seems like the fussiest of bagel-makers say boil the bagels so I did. I filled my braising pan just over halfway with water and added 1 tsp of baking soda and some honey. The baking soda will help give the bagels a pretzely texture and taste.
FYI, do not add the honey until the water is boiling!
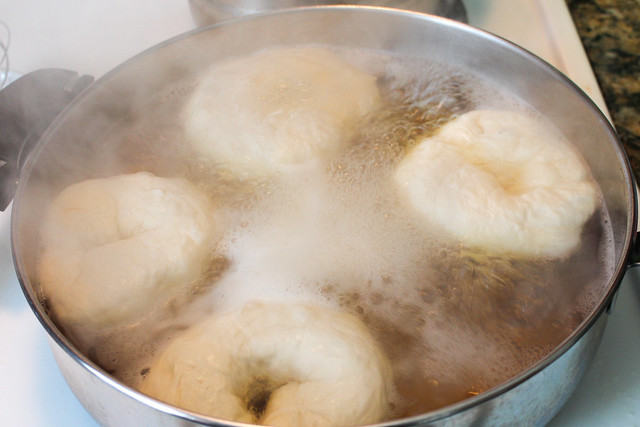
Once the water is boiling add your bagels and watch them PUFF! Wow, so cool! Let them boil for at least a minute on each side.
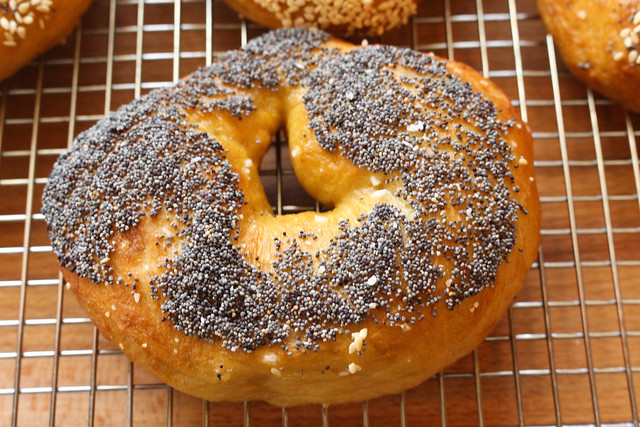
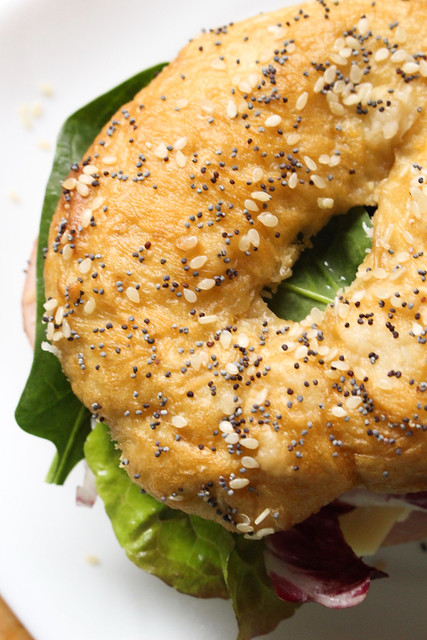
The Bagel Toppings
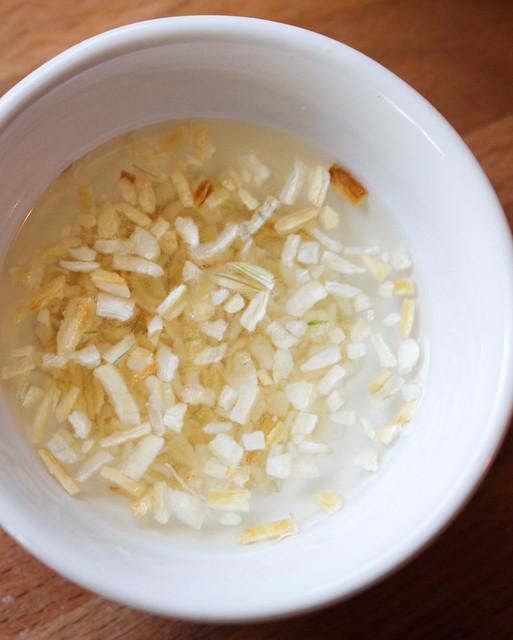
My favourite bagels are Everything Bagels but my friend Ivy The Happy Whisk warned me that minced onion can burn so I decided to rehydrate it in some water for a few minutes and then drain before adding it to some poppy and sesame seeds.
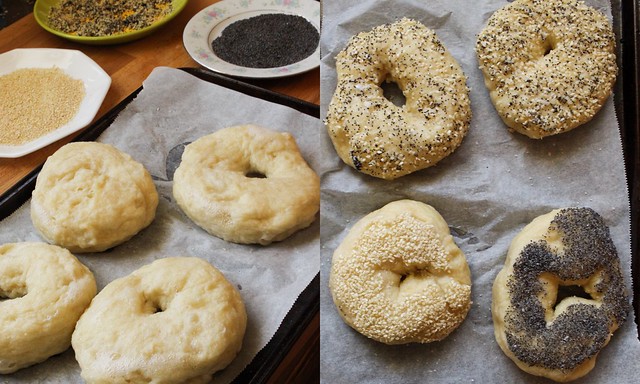
It is probably best to dunk the bagels in an egg wash first before the toppings which, in my haste, I forgot to do!
Also give them a good sprinkling with kosher salt (or pretzel salt if you have it).
The Bagel Baking
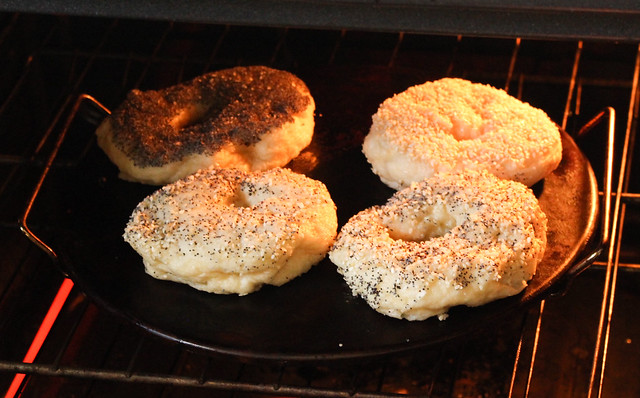
I preheated the oven to 425F with my pizza stone inside. When ready I added the bagels and baked for 12-15 minutes, until they were golden brown and sounded hollow when I tapped the bottom. If you do not have a pizza stone, just bake on a regular baking sheet.
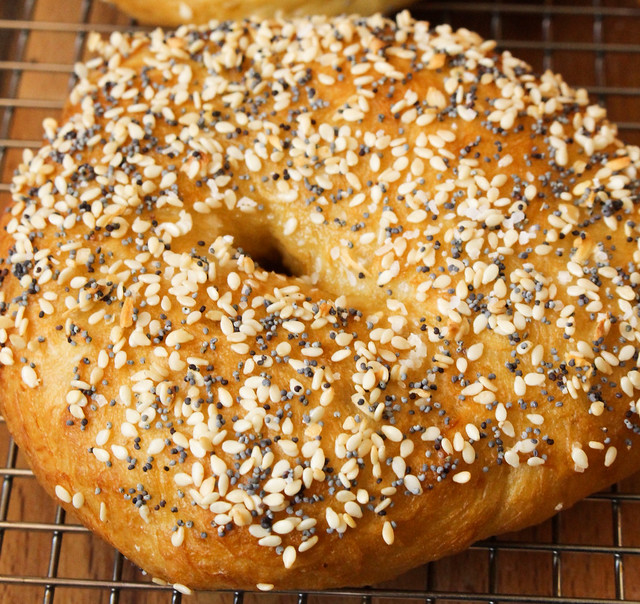
D-A-M-N!!! Look at that! They look like REAL bagels!
The Bagel Eating
I took one of the everything bagels and sat down to taste it and just melted. My bagels are crunchy on the outside but super soft on the inside. When fresh out of the oven, that minced onion was out of this world and added so much flavour. I did not add anything to my bagel at all, I just ate my first one plain which I have never done before.
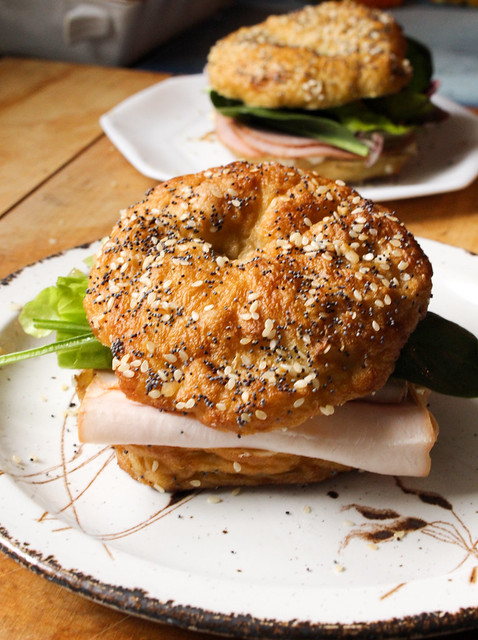
If you are looking for a dense bagel, this is not the recipe for you. Reg actually did not seem to like them that much because they are so tender. I also boiled some ahead of time and then after a while put them in the oven which resulted in kind of flat bagels so do not do that! Boil, add toppings and bake ASAP!
Me? I loved them. Bagels can be such a foodie commitment, so dense and heavy, but these reminded me more of croissants, light and airy! Maybe next time I will go a little lighter on the malt powder which, wow, really did its job. Perhaps too well for some people but not me. I could not stop eating my own bagels.
Yay!!! One achievement off my Foodie Bucket List and OMG, such a powerful learning and tasting experience. I loved every second of it even though it was quite a first project. Awesome. I hope you learned something too and feel comfortable making your own bagels one day as well.


OMG!!!!!
I love it. Love it. Love it.
Bagels are the best and those look fantastic.
Woohoo. Here’s to more of your Foodie Bucket List.
Thank you so much Ivy! So I did a good job?! Oh it feels awesome getting that foodie project done and completely. Woot!
Yes, woot!!!!
Man oh man, these look good! I love bagels — REAL bagels that have been boiled and then baked. Bravo, Suzie!
Thank you so much Debra! And I am glad I did you proud with boiling and then baking the bagels. 🙂 I feel quite pleased with how everything turned out, even though Reg didn’t like them!
I really wish you lived closer…
Same here! For many reasons my friend…
These look amazing!! Great work, Suzie! I’m excited to keep watching you cross things off your list!
Thank you so much NutkinNB! It’s so exciting to be working on that list and already be crossing things off. 🙂