

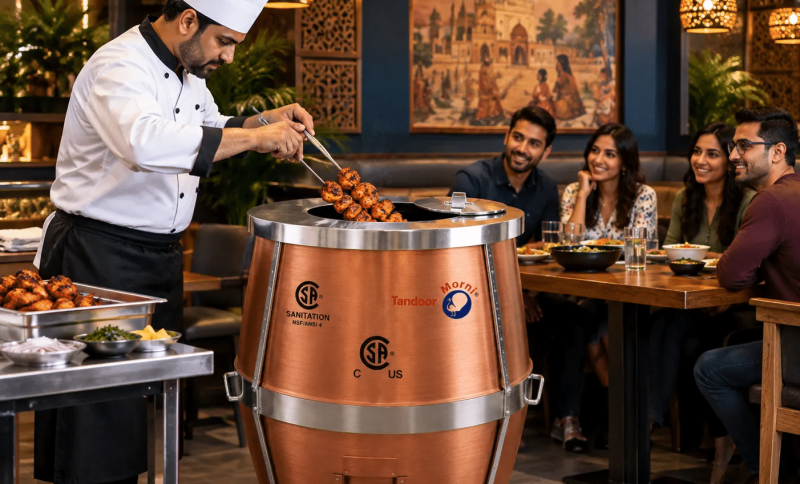
If you’ve ever wondered why your homemade Indian food never quite reaches the restaurant version, the answer is almost always the same. It’s the oven. Here’s how to close that gap – and make one of the best meals you’ll cook all year.
There are some meals that just feel like an occasion. Chicken tikka is one of them – that deeply spiced, slightly charred exterior hiding meat so moist you wonder how heat that intense didn’t dry it out completely. Paired with naan bread that’s pillowy inside and blistered at the edges, it’s the kind of plate that makes the table go quiet for a few minutes while everyone just eats.
I spent years trying to recreate this at home. Broilers, cast iron pans, pizza stones, outdoor grills. The results were always somewhere between good and pretty good. Close, but never the real thing. It took me longer than I’d like to admit to understand why: the cooking method is the recipe. You can use identical spices, the exact same marinade, marinate the chicken for the same amount of time – and still produce something fundamentally different if the oven isn’t doing what a tandoor does.
A tandoor is a cylindrical clay oven that reaches temperatures between 800 and 900 degrees Fahrenheit – roughly double what a home oven can achieve at its maximum setting. The clay walls absorb heat from the fuel source and radiate it back from all directions simultaneously. That means the exterior of the chicken caramelises and seals within seconds of the skewers going in. The marinade doesn’t slowly cook off – it chars and deepens and becomes part of the crust. The naan dough, pressed directly against the hot clay wall, blisters in under two minutes. No grill or broiler produces these results because none of them reach this temperature through this material.
This recipe is written for a residential tandoor oven. If you’re new to clay oven cooking, there’s a short note at the end on what to look for. For now, let’s get cooking.
Chicken Tikka – The Marinade and the Cook
What You’ll Need (serves 4)
For the Chicken
- 800g boneless chicken thighs or breasts, cut into 5cm pieces
- 200g full-fat plain yoghurt
- 2 tbsp lemon juice
- 2 tbsp neutral oil (sunflower or avocado)
- 1 tbsp ginger paste
- 1 tbsp garlic paste
- 1½ tsp Kashmiri chilli powder – use regular chilli for more heat
- 1 tsp each: cumin powder, coriander powder, garam masala
- ½ tsp turmeric
- 1 tsp salt, or to taste
- 1 tbsp dried fenugreek leaves (kasuri methi) – crush between your palms before adding
- A few drops of orange food colouring (optional – traditional for the deep restaurant colour)
A Two-Stage Marinade
The reason chicken tikka from a good restaurant tastes so different from a quick home version usually comes down to marination time – and the technique behind it. A two-stage marinade isn’t complicated, but it makes a real difference to how the spices penetrate the meat and how forgiving the cook is.
Stage one is a quick acid tenderiser. Combine the lemon juice, a pinch of salt, and the ginger and garlic paste. Before you toss the chicken in it, score each piece with a sharp knife – two or three shallow cuts across the thickest part. This isn’t just for show; it opens the surface so the marinade actually gets into the muscle rather than just coating the outside. Toss the chicken in the first marinade and leave it at room temperature for about 20 minutes.
Stage two is where the flavour builds. Mix the yoghurt, oil, all the dry spices, the kasuri methi, and the food colouring if you’re using it. Add the pre-marinated chicken, coat it thoroughly, cover the bowl, and refrigerate for at least 4 hours. Overnight is genuinely better – the flavour difference between 4 hours and 12 hours is noticeable. Well-marinated chicken also holds its moisture far more reliably under intense heat, which matters in a tandoor where the cook is fast and you don’t get much margin for error.
Firing the Tandoor and Cooking the Chicken
Fire your tandoori oven 35 to 40 minutes before you want to cook. The goal is for the clay walls to be fully heated through – not just the air inside the chamber, but the clay itself radiating evenly from all sides. When the walls reach cooking temperature, they seal the chicken exterior almost instantly, which is what produces the char without drying out the inside. An oven that hasn’t fully come up to temperature gives you a slower cook – the exterior doesn’t seal fast enough, moisture escapes, and the chicken ends up drier than it should be.
Thread the marinated chicken pieces onto flat skewers, leaving a small gap between each piece so the heat circulates freely. Lower the skewers vertically into the tandoor. Depending on the size of your pieces and how hot the oven is running, the chicken will be done in 12 to 18 minutes.
What you’re looking for: a deep red-orange exterior with visible char at the edges, and the fat from the yoghurt and oil dripping away into the base of the oven rather than sitting around the meat. That dripping is a sign things are going right – the fat leaves, the flavour concentrates, the crust sets. Pull the skewers when the chicken looks done, let it rest for 5 minutes on a warm plate, and the juices will redistribute through the meat before you cut into it.
Finish with a squeeze of fresh lemon, thinly sliced raw onion, and fresh coriander. A quick mint chutney on the side – blended yoghurt, fresh mint, green chilli, lemon, and a pinch of salt – is the classic accompaniment and genuinely worth the two minutes it takes to make.
Naan Bread – The Dough and the Wall
What You’ll Need (makes 6–8 naan)
For the Dough
- 400g plain flour, plus extra for dusting
- 1 tsp instant yeast
- 1 tsp sugar
- 1 tsp salt
- 150ml warm water
- 100ml warm milk
- 3 tbsp full-fat plain yoghurt
- 2 tbsp neutral oil
For the Garlic Butter
- 4 tbsp unsalted butter, melted
- 4 cloves garlic, very finely minced or pressed
- 2 tbsp fresh coriander, finely chopped
- A pinch of salt
Making the Dough
Dissolve the yeast and sugar in the warm water and leave it for 10 minutes. You’re waiting for it to foam – that tells you the yeast is active and the bread will rise properly. Combine the flour and salt in a large bowl, then add the yeast mixture, warm milk, yoghurt, and oil. Mix until a rough dough forms, then turn it out and knead for 8 to 10 minutes until it’s smooth and slightly tacky. Naan dough is softer than standard bread dough – almost pillowy when it’s right. If it feels stiff, it’ll come out denser than you want.
Oil the bowl lightly, return the dough, cover with a damp cloth, and leave it somewhere warm for 1 to 1.5 hours until it has doubled in size. This rest really matters – the yeast produces the gas that gives naan its characteristic puffed centre. If you rush it, the bread comes out flatter and less interesting. The good news is that this is also the time you can be getting the chicken marinade ready if you’re doing both in the same session.
Once the dough has risen, divide it into 6 to 8 equal balls. Working with one at a time on a lightly floured surface, roll or stretch each ball into an oval roughly 25 to 30cm long and about 3 to 4mm thick. It’ll look thinner than you expect – the heat in the tandoor expands the dough dramatically on the wall, so what looks flat going in comes out beautifully puffed.
Cooking the Naan Bread in the Tandoor
The clay oven wall needs to be consistently hot for the naan to stick and blister properly. If you’re cooking the chicken and naan in the same session, start the naan after the chicken has rested – the wall temperature should still be right where you need it.
Lightly dampen one side of the rolled dough with water – just enough to help it grip the clay. Using a naan gaddi (the cushioned pad made specifically for this) or a folded oven cloth, press the damp side firmly against the inner clay wall. It grips almost immediately. Leave it for 60 to 90 seconds without touching it. You’ll see it start to puff and blister as the steam inside the dough expands against the hot clay surface – that’s the sight that makes every bit of effort worthwhile.
When the surface has developed good colour and char at the edges, use the gaddi or a long skewer to peel the naan cleanly away from the wall. It releases naturally when it’s ready. Resist the urge to pull early – naan that isn’t quite done will tear.
The moment it comes off the wall, brush it generously with the garlic butter. The butter melts into the hot bread within seconds and the garlic softens against the residual heat. Scatter fresh coriander over the top. Each subsequent naan gets faster as you develop a feel for your specific oven’s timing – the first one is always the calibration round.

Serving the Meal
Put both on the table while everything is still hot. The contrast between the deeply spiced, char-edged chicken and the buttery, garlicky naan bread is what makes this pairing so enduring – they’ve been served together for a reason. Mint chutney, thinly sliced onion rings dressed with lemon and a little chilli, and a bowl of dal on the side makes it a proper spread.
This works as a dinner party centrepiece as well as a relaxed family Saturday evening. What makes it feel special isn’t the difficulty – the recipe is genuinely straightforward – it’s the result. Tandoor-cooked food has a quality that doesn’t come from any other method, and once you’ve served it to people, they tend to remember it.
A Note on the Equipment
This recipe is written for a tandoor oven. Residential models are now available in sizes designed specifically for home kitchens, covered patios, and backyards – from compact units that sit on a patio and heat up in about 25 minutes to larger outdoor installations suited to bigger gatherings. Tandoor Morni has been manufacturing certified clay tandoor ovens in North America since 1992, and their home range uses the same refractory clay and gas specifications as their commercial restaurant models. The R26 mini is the most popular entry point for home cooks, sized to handle a full family dinner comfortably.
If you don’t yet have a tandoor, this recipe does adapt to a very hot broiler at maximum temperature – but the results are noticeably different. The char is less intense, the marinade caramelises less dramatically, and the naan bread, while still enjoyable, lacks the specific blistering that direct clay contact produces. The tandoor version is worth working toward. Once you’ve cooked both dishes this way, the broiler version becomes the backup, not the plan.
The Takeaway
Chicken tikka and naan bread made in a tandoor is not a difficult recipe. The marinade is simple. The dough is forgiving. The actual cooking is fast – faster than most people expect when they first use a clay oven. What changes everything is the temperature, the clay, and the specific way radiant heat handles both meat and bread that no other appliance can replicate.
Pick a Saturday when you have the evening free. Fire the oven, mix the garlic butter while the chicken marinates and the dough rises, and give yourself the pleasure of cooking both dishes in sequence from the same live clay oven. It’s the kind of meal people ask about afterwards. It’s the kind of meal that earns a reputation.


