


Mini key lime pies might look like simple desserts, but there’s more to these bite-sized treats than meets the eye. Bakers everywhere are finding out why these little pies have become such a hit at gatherings and celebrations.
They’re easy to serve, fun to make, and pack all that classic tangy flavor into a perfect single portion. However, getting that signature lime taste just right takes a bit of know-how.
What’s the real difference between these mini versions and traditional key lime pie? And why do people keep coming back for seconds? Anyone who’s ever wondered about making mini key lime pies is about to find out.
Why You’ll Love These Mini Key Lime Pies
These little desserts bring big benefits to any baking plan. Mini key lime pies solve so many problems that come with serving traditional pies. Here’s why bakers and party hosts keep choosing them.
- Perfect portion control: Each person gets their own complete dessert without needing to slice or share, which means no messy cutting or guessing on serving sizes.
- Easy transportation: Unlike full-sized pies that risk cracking during travel, these miniature versions stay secure in their individual crusts and pack neatly into containers.
- Customization options: Bakers can easily adjust toppings or flavors for different mini key lime pies in the same batch, satisfying everyone’s preferences at once.
- Faster preparation time: Smaller pies bake through more quickly than large ones, cutting down kitchen time while still delivering that signature tangy taste.
- Impressive presentation: Guests love having their own individual dessert, and the cute factor makes mini key lime pies a conversation starter at any gathering.
Ingredients for Mini Key Lime Pies
Getting the right ingredients makes all the difference when preparing mini key lime pies. Most items are probably already sitting in the kitchen. Here’s everything needed to create these tangy treats.
| Ingredient | Amount |
|---|---|
| Graham cracker crumbs | 1½ cups |
| Melted butter | 5 tablespoons |
| Sweetened condensed milk | 14 oz can |
| Key lime juice | ½ cup |
| Egg yolks | 3 large |
| Lime zest | 1 tablespoon |
| Heavy whipping cream | 1 cup (optional) |
How to Make Mini Key Lime Pies
Making these desserts from scratch isn’t complicated at all. The process breaks down into simple steps that anyone can follow. With a muffin tin and basic mixing skills, bakers can create restaurant-quality results at home.
1. Preparing the Crust
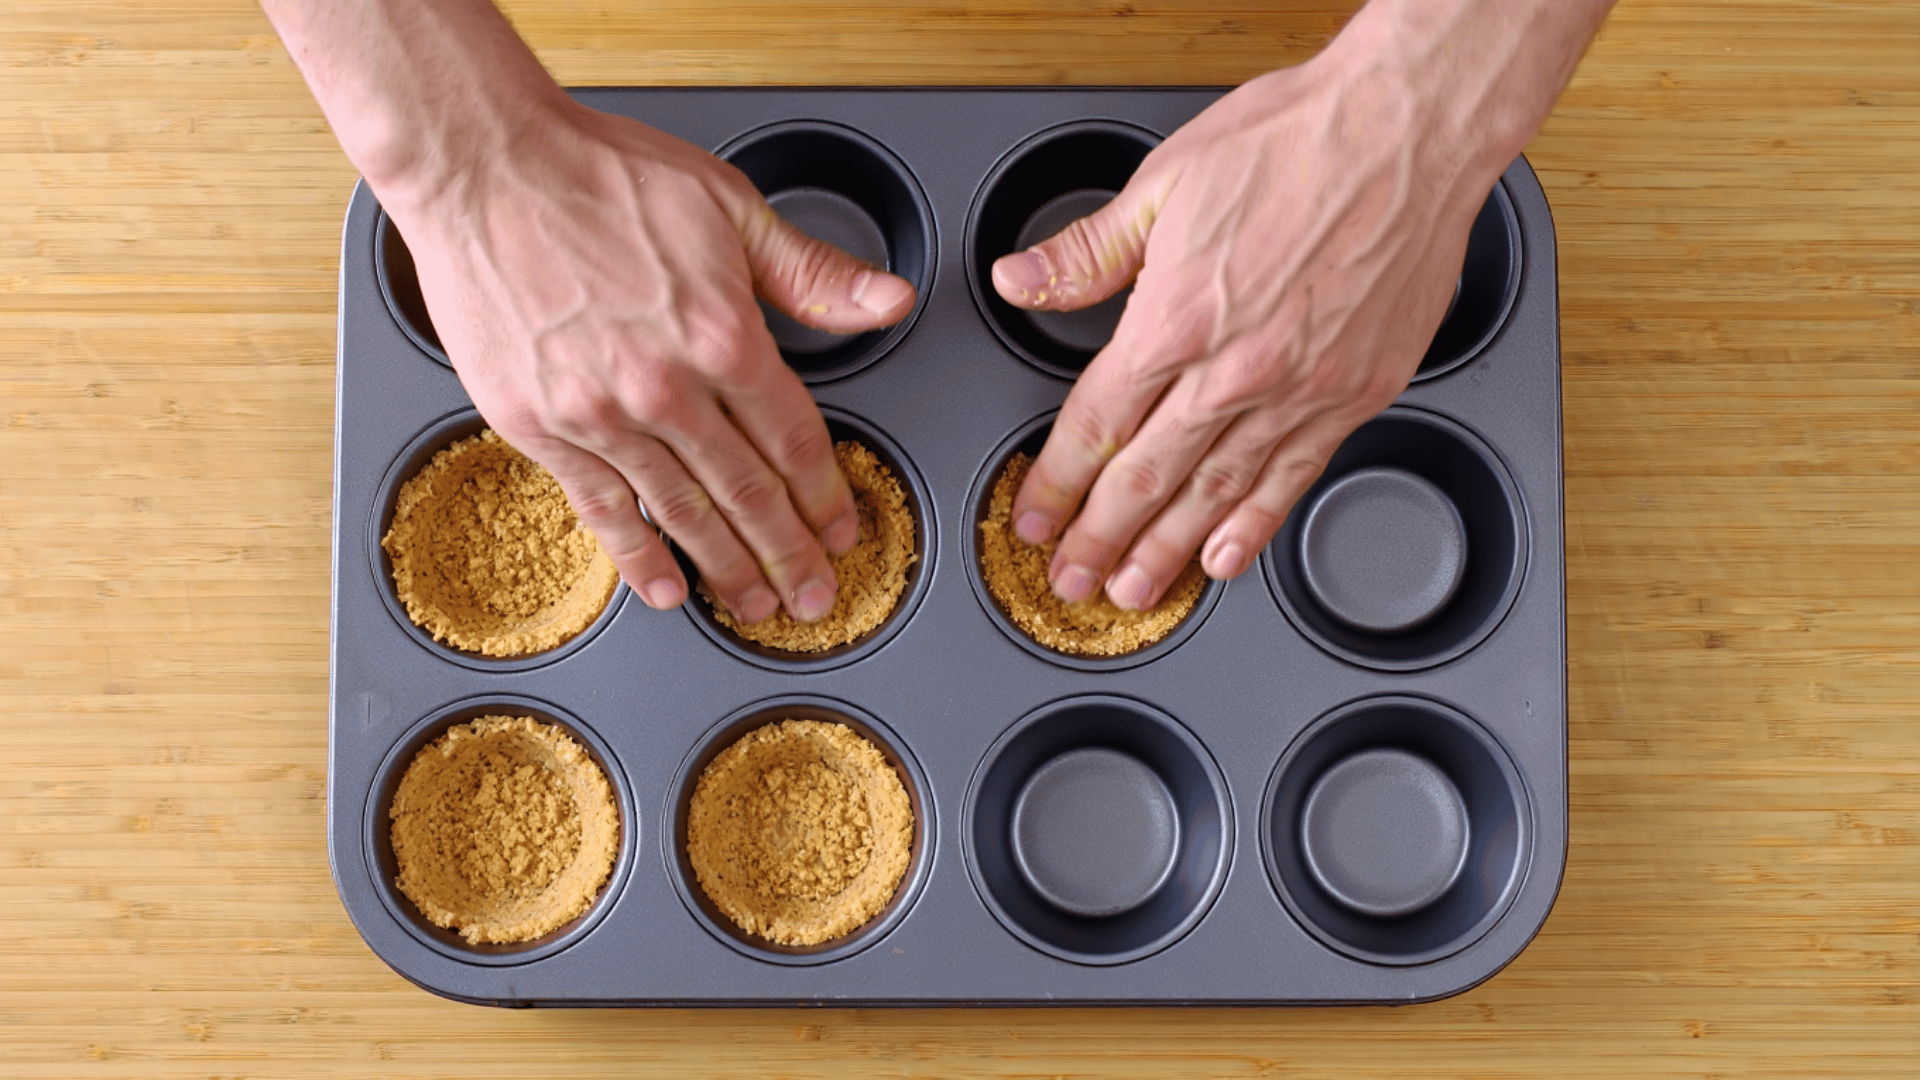
Start by mixing graham cracker crumbs with melted butter in a bowl until the texture resembles wet sand. Press about two tablespoons of this mixture firmly into each muffin tin cup.
Creating an even layer on the bottom and slightly up the sides. Bake the crusts at 350°F for five minutes to set them. Let them cool completely before adding any filling.
2. Making the Filling
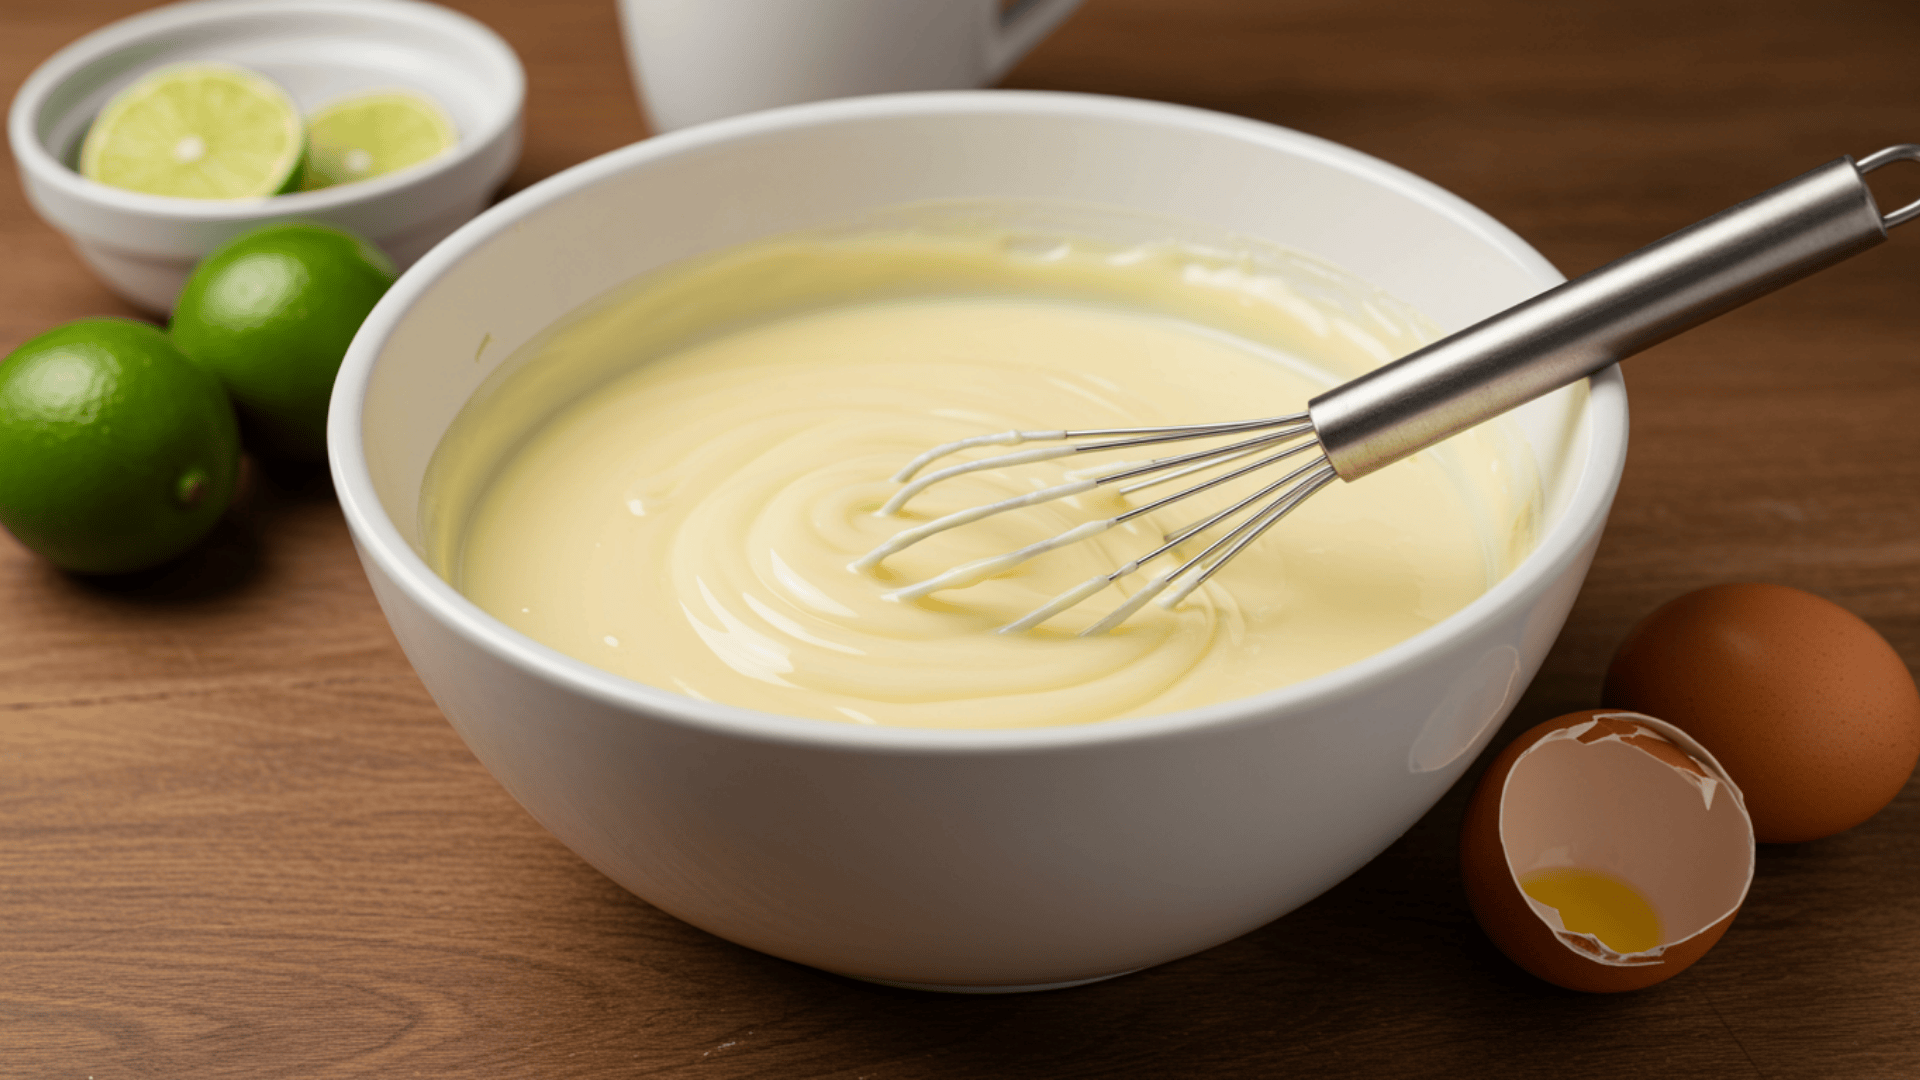
Whisk together sweetened condensed milk, key lime juice, egg yolks, and lime zest in a medium bowl until smooth and creamy. The mixture should be pale yellow and well-combined without any lumps.
This tangy filling is what gives mini key lime pies their signature flavor. Make sure all ingredients reach room temperature first for the best texture and easier mixing.
3. Baking and Cooling
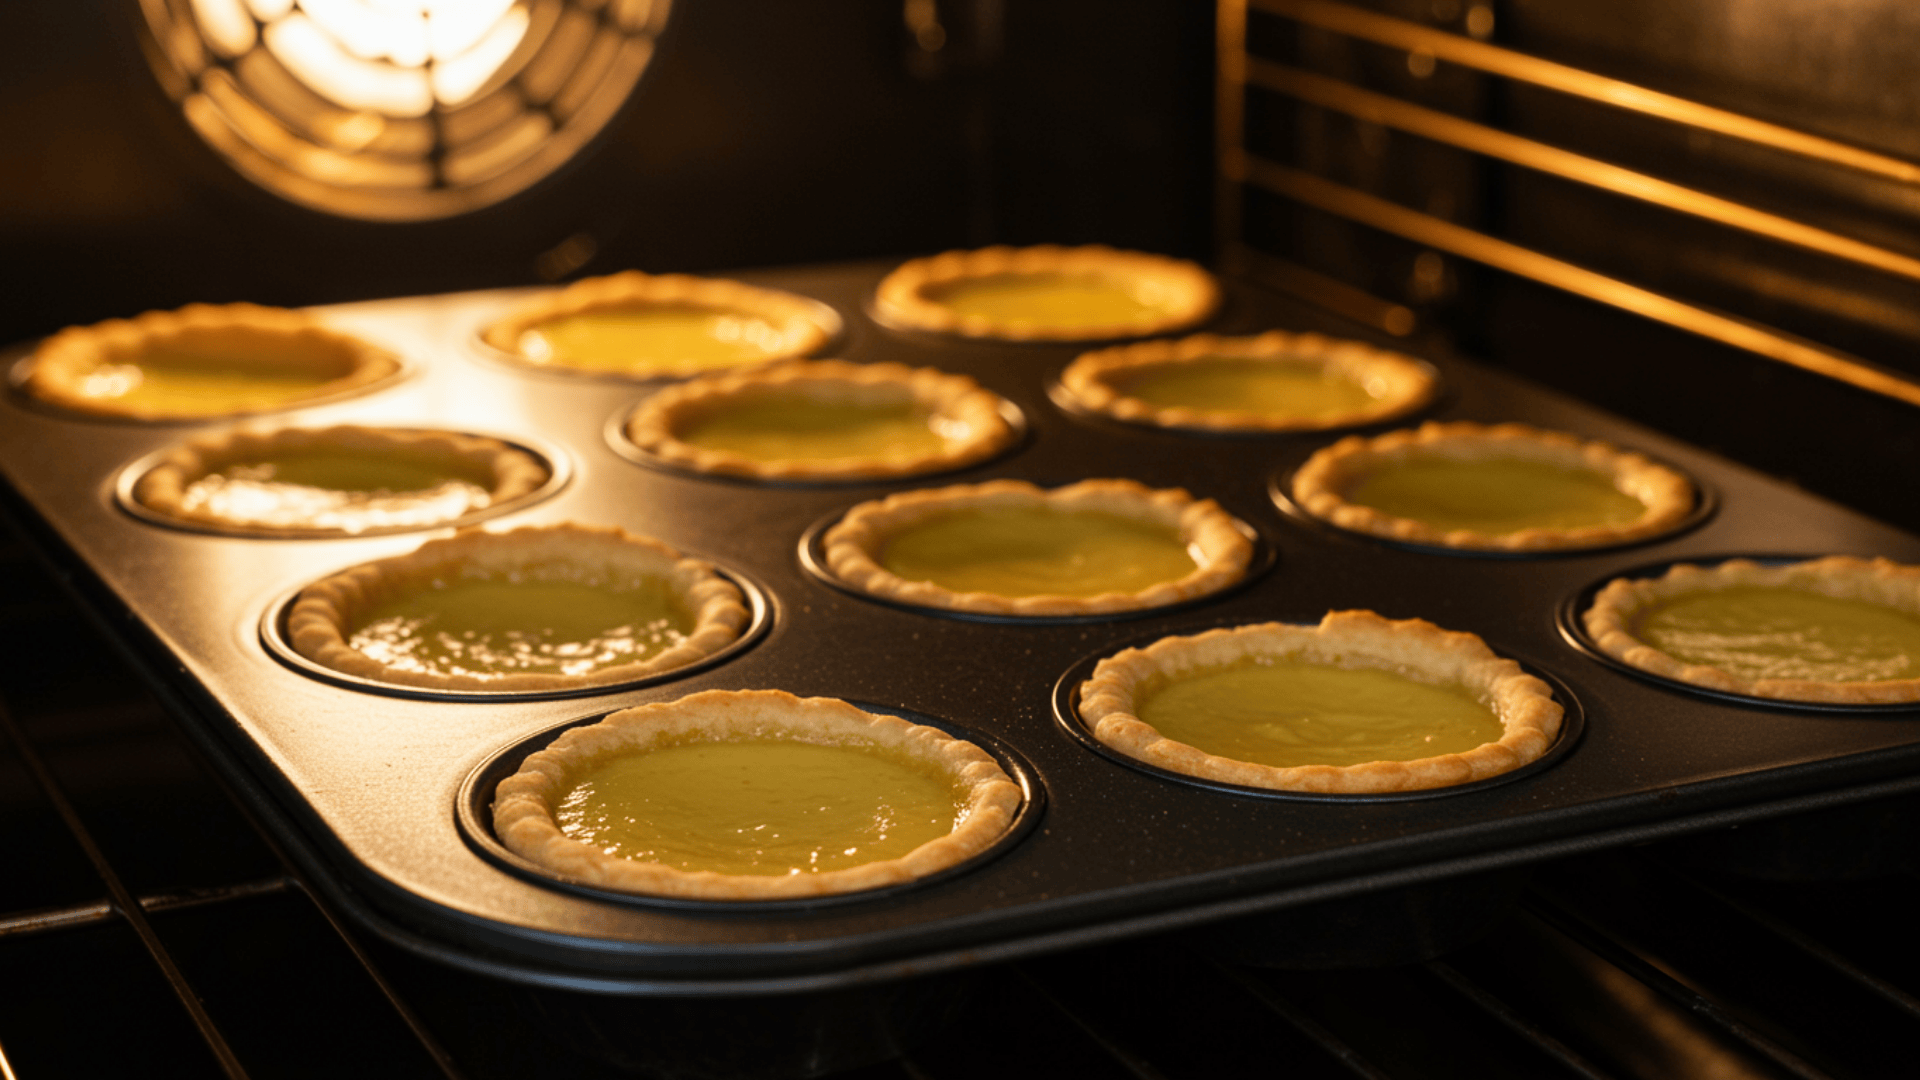
Pour the filling mixture evenly into each prepared crust, filling them about three-quarters full to prevent overflow. Bake at 325°F for twelve to fifteen minutes until the edges set, but centers still jiggle slightly.
Remove from the oven and let them cool at room temperature for thirty minutes. Transfer to the refrigerator and chill for at least three hours before serving.
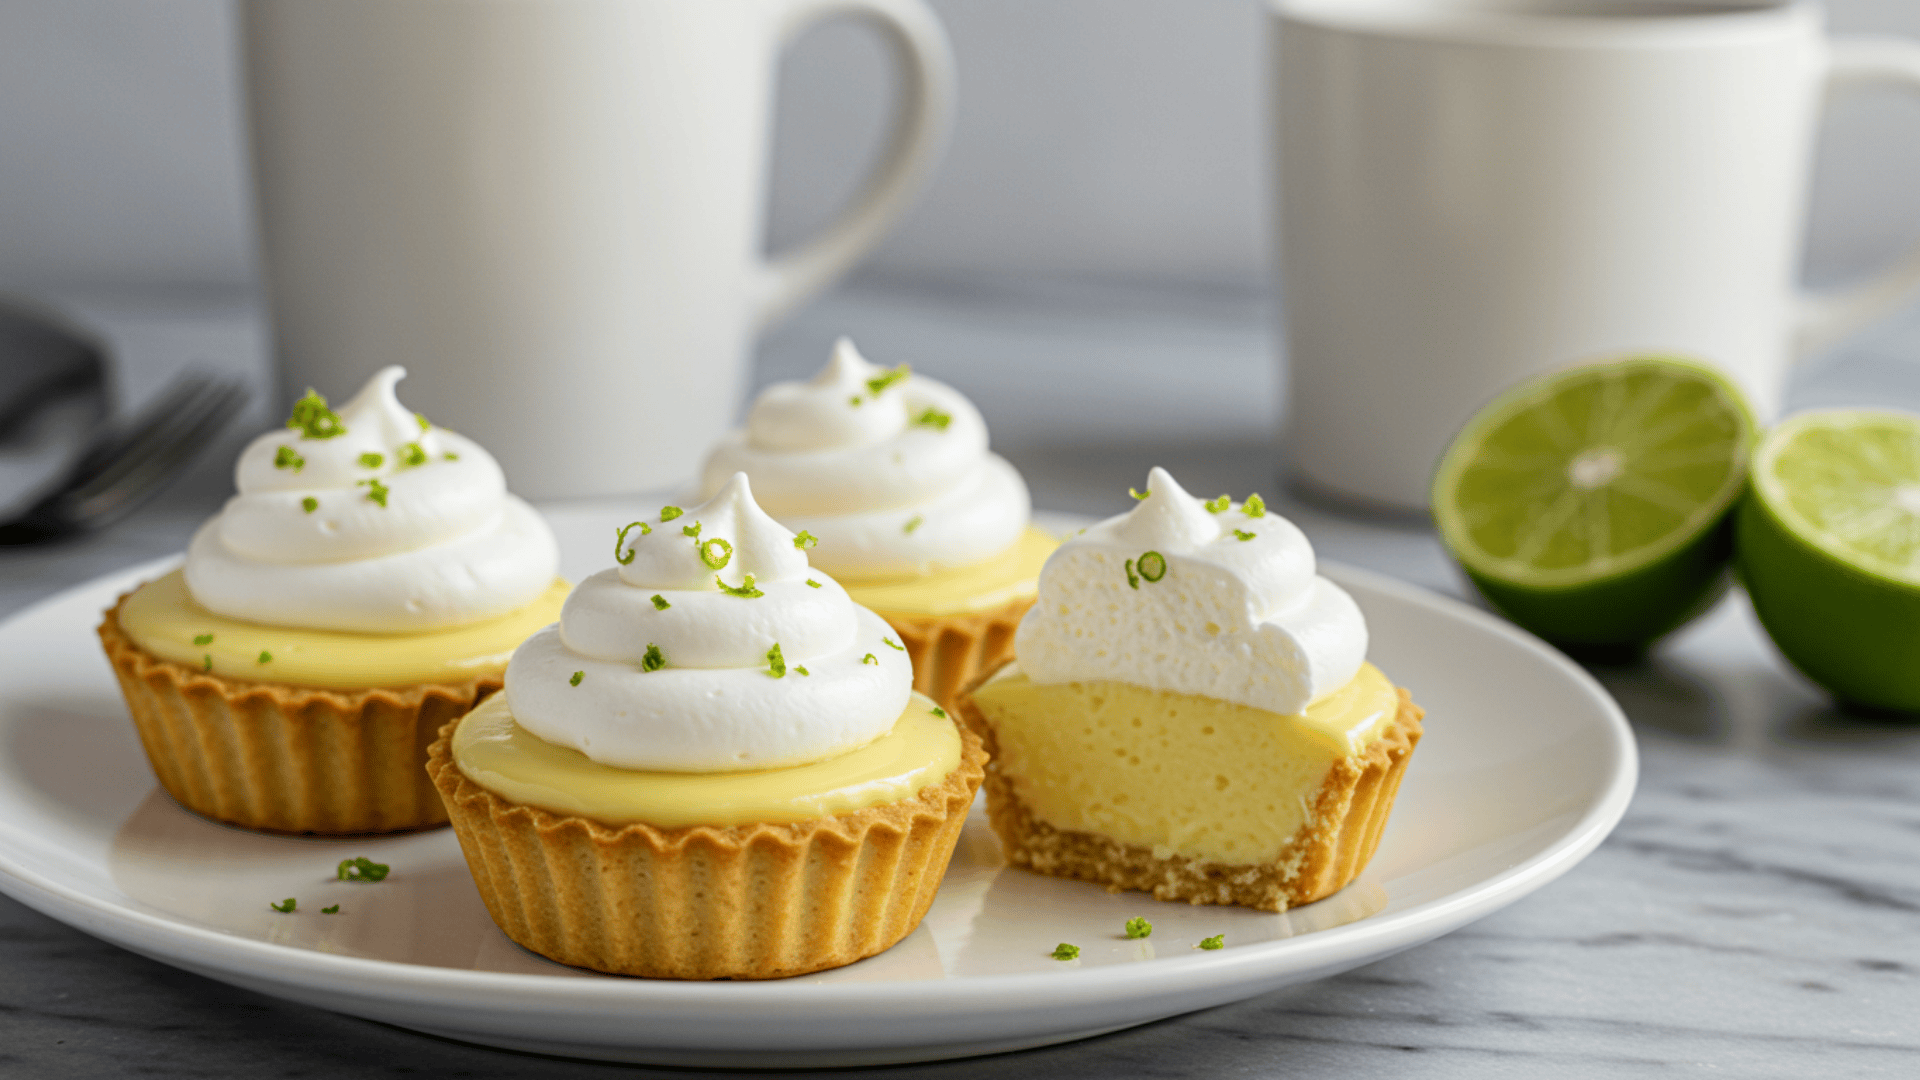
4. Adding the Finishing Touches
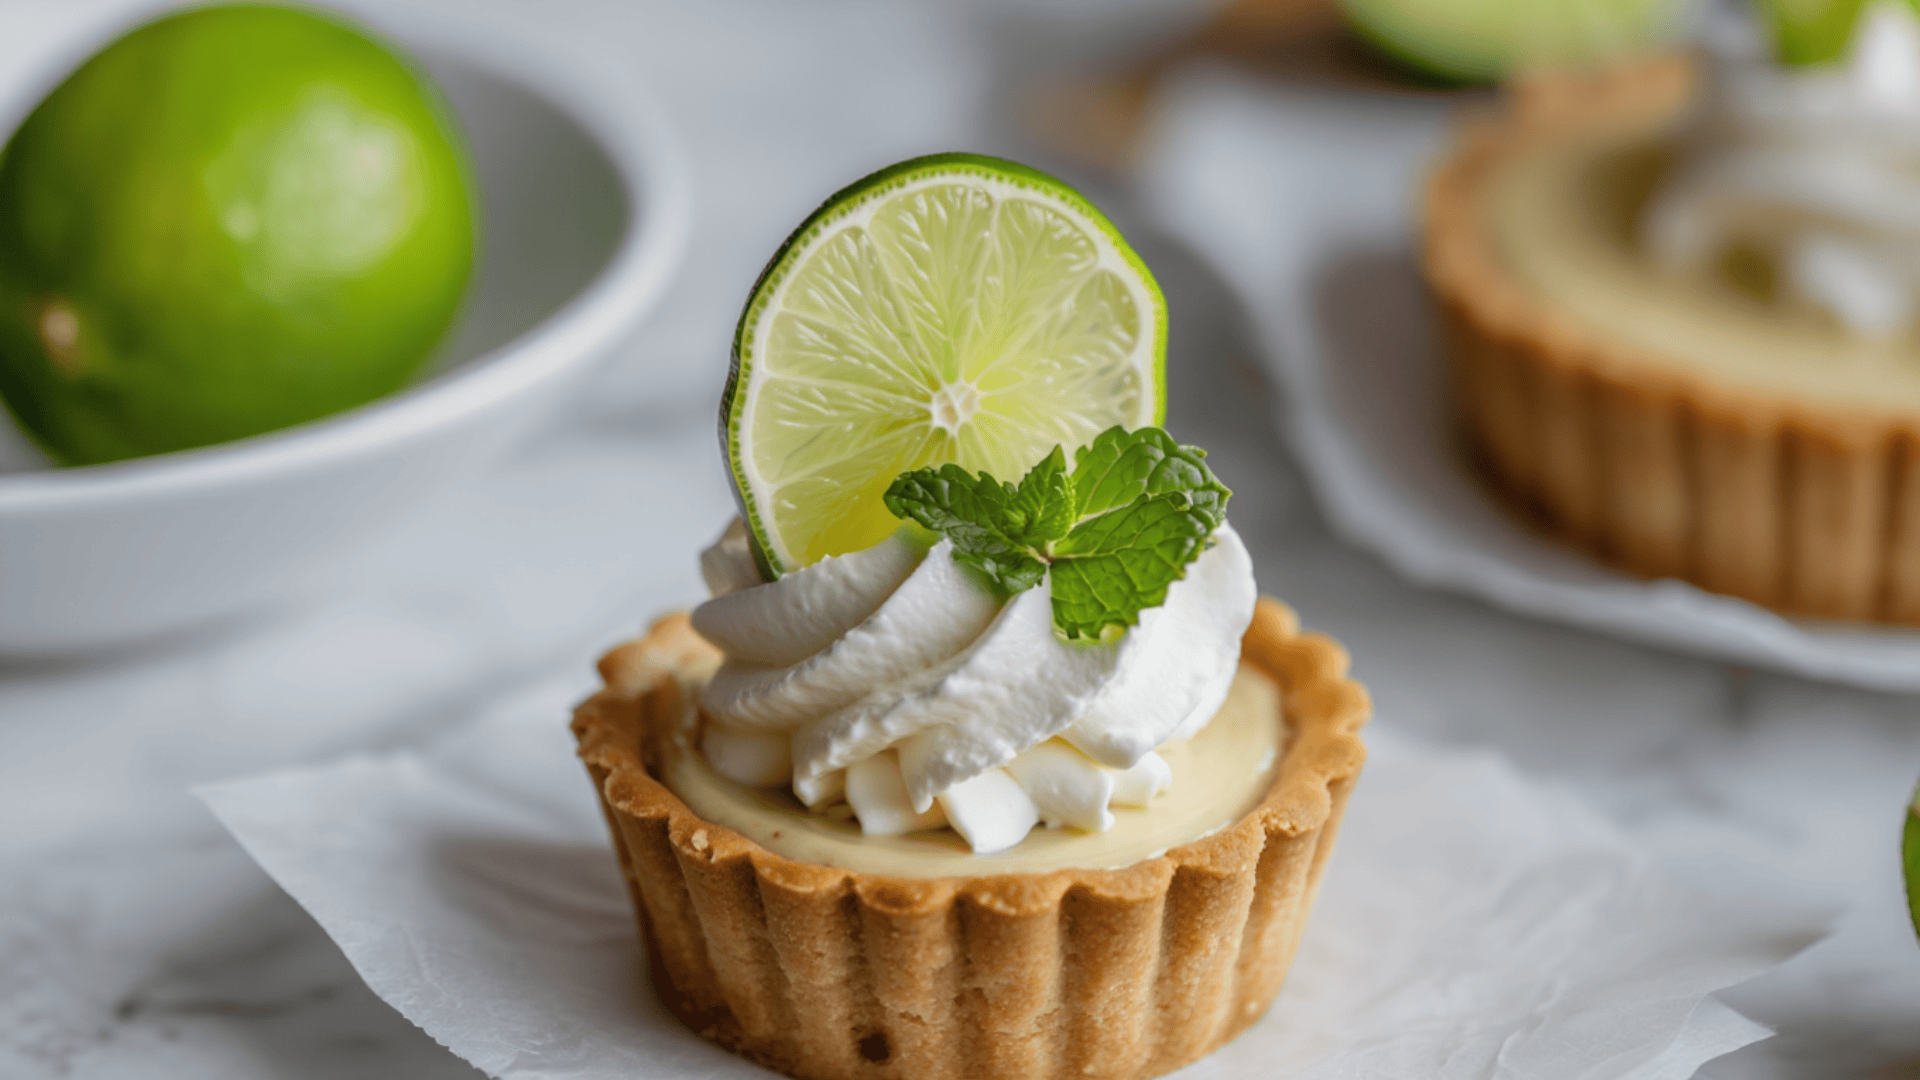
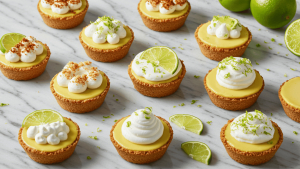
Once the mini key lime pies are completely chilled and firm, they’re ready for toppings. Whip heavy cream with a bit of sugar until stiff peaks form, then pipe or dollop it onto each pie.
Garnish with thin lime slices, extra zest, or even crushed graham crackers for added crunch. These final touches make each bite look as impressive as it tastes.
Now the hard part begins, waiting to dig in! These chilled treats taste even better after sitting overnight in the fridge, letting all those flavors blend together perfectly.
Recipe Notes
These quick reference notes make it easier to prepare mini key lime pies with confidence. Keeping the baking, chilling, and serving details in one place helps ensure the pies set properly and turn out smooth, tangy, and delicious every time.
| Note | Details |
|---|---|
| Prep Time | About 15 minutes |
| Crust Bake Time | 5 minutes |
| Filling Bake Time | 12–15 minutes |
| Total Bake Time | 15–20 minutes |
| Cooling Time | 30 minutes at room temperature |
| Chill Time | At least 3 hours |
| Method | Baked in a muffin tin |
| Difficulty | Easy |
| Filling Level | Fill each crust about three-quarters full |
| Doneness Cue | Edges should be set, but centers should still jiggle slightly |
| Topping | Heavy whipped cream is optional |
| Garnish Ideas | Lime slices, extra zest, or crushed graham crackers |
| Best Serving Time | Best served chilled |
| Make-Ahead Tip | Tastes even better after sitting overnight in the fridge |
Must Try Recipe Variations
The classic version is delicious, but mini key lime pies can turn into so many exciting flavors. These variations keep the tangy base while adding new twists that surprise and delight.
1. Chocolate Mini Key Lime Pies
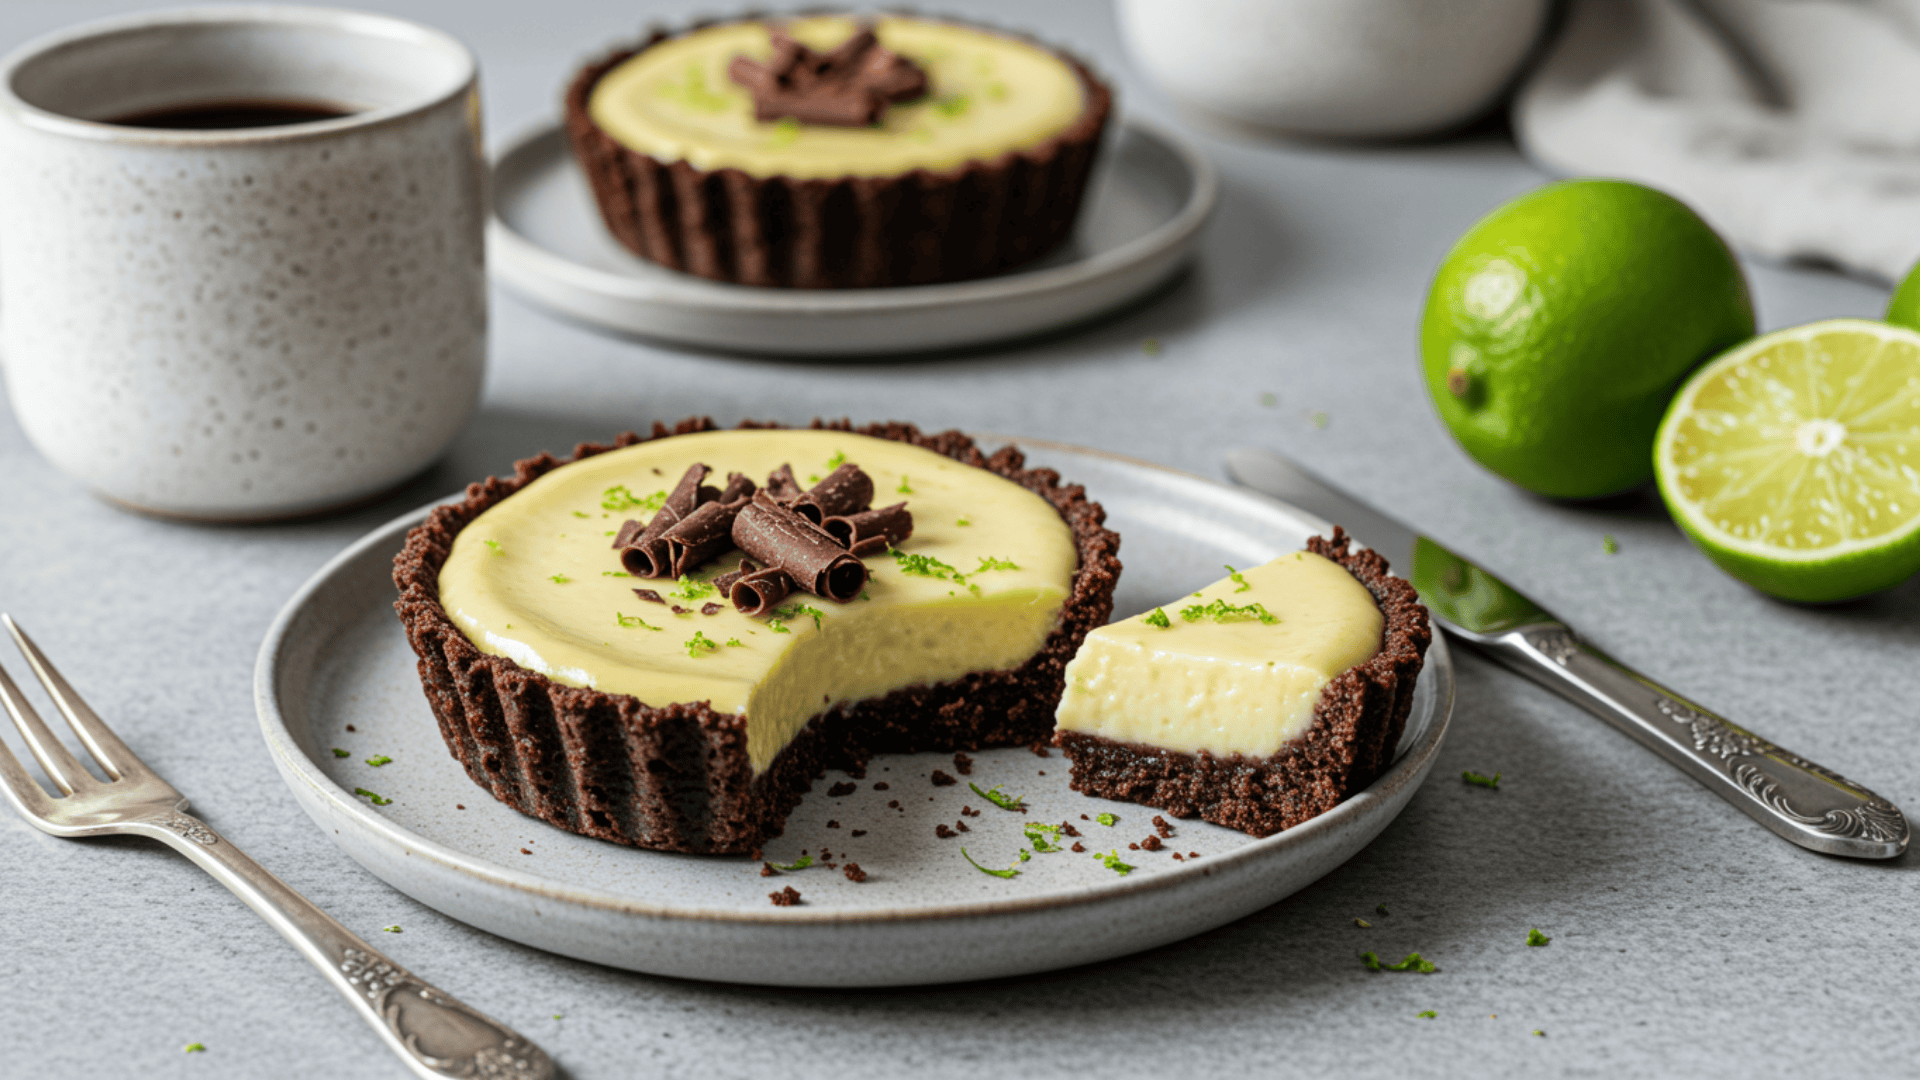
This variation combines chocolate and citrus for an unexpected flavor pairing. The chocolate cookie crust adds richness that perfectly balances the tart filling. This version works great for anyone wanting something a bit more decadent than the original.
- Ingredients: Chocolate cookie crumbs (1½ cups), melted butter (5 tablespoons), standard key lime filling, mini chocolate chips (½ cup).
- Steps: Replace graham crackers with chocolate cookies for the crust, mix chocolate chips into the lime filling before pouring, bake following the original recipe instructions, and top with chocolate shavings after chilling.
2. Coconut Mini Key Lime Pies
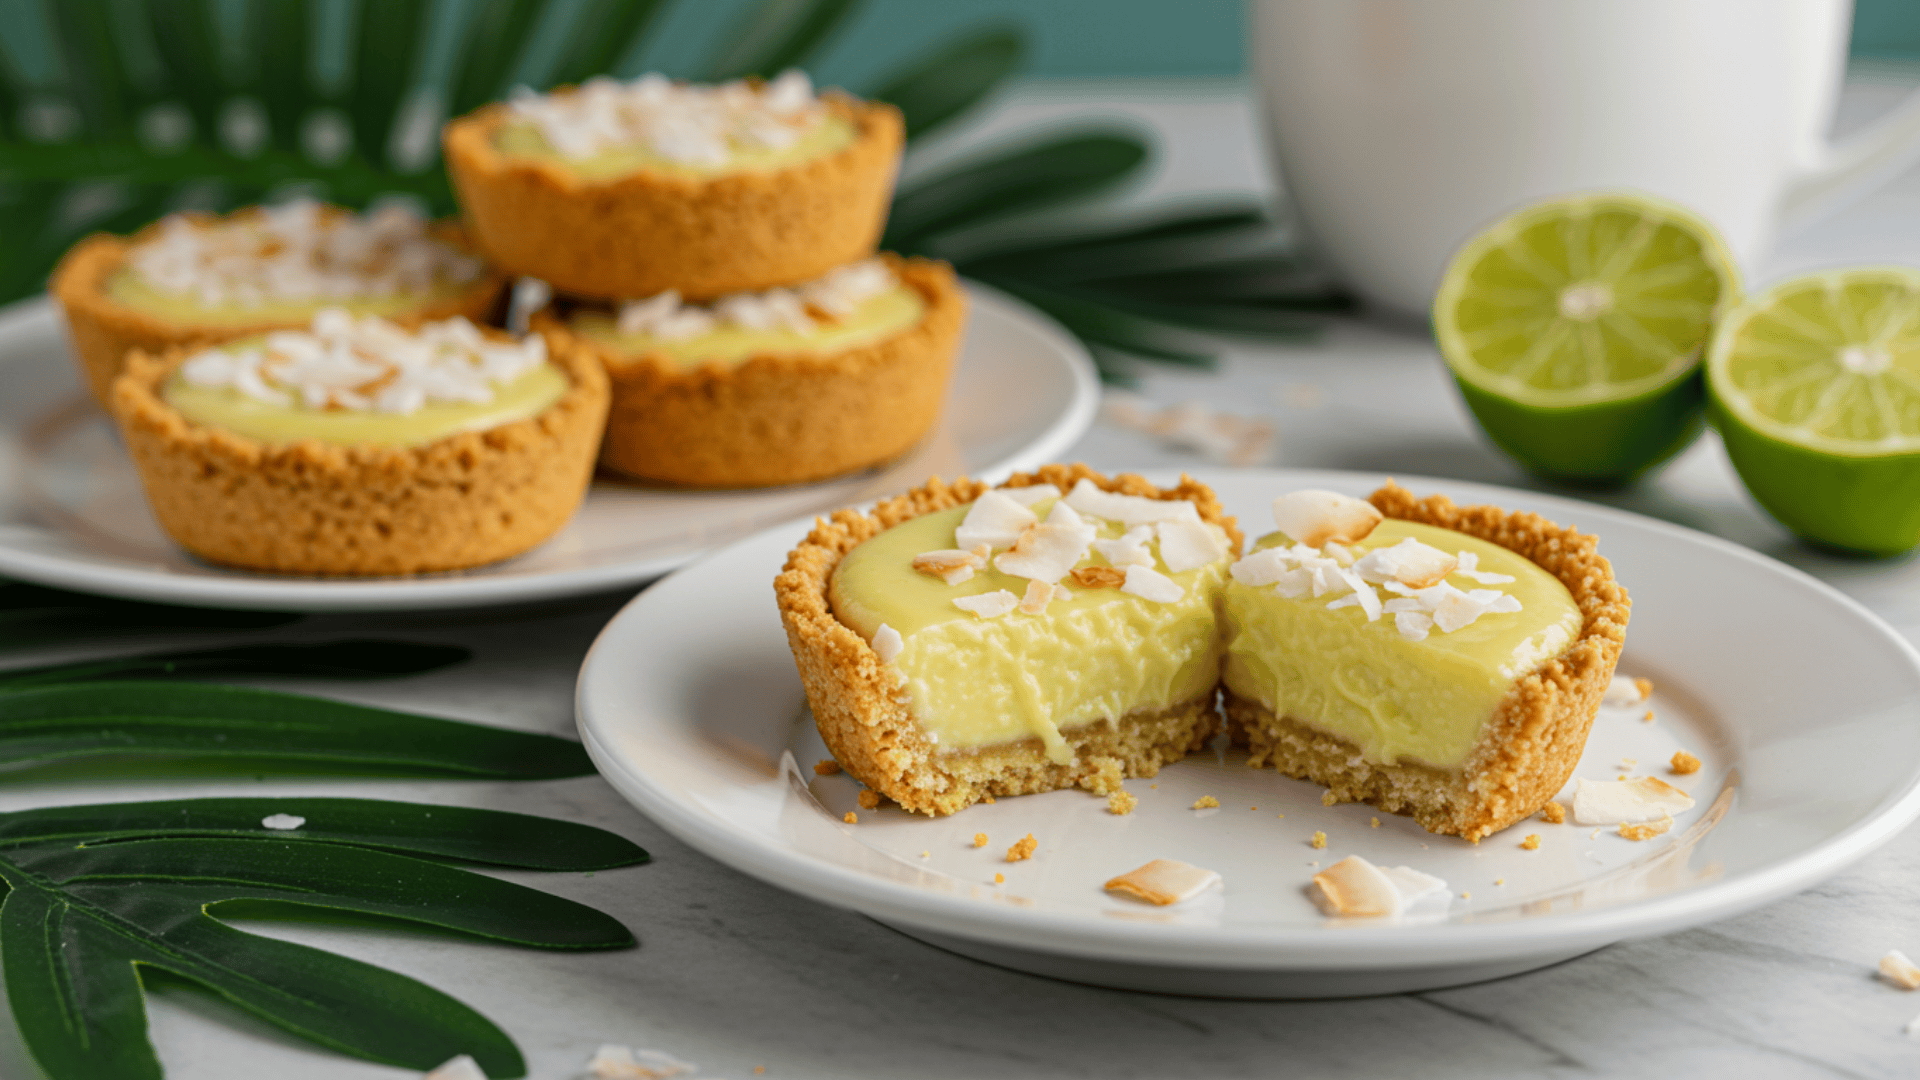
Coconut and lime create a tropical combination that tastes like vacation. Toasted coconut flakes add texture and a nutty sweetness to each bite. This variation brings island vibes to any dessert table. The coconut flavor complements the lime without making things too sweet.
- Ingredients: Coconut cookie crumbs (1½ cups), melted coconut oil (5 tablespoons), standard key lime filling, shredded coconut (1 cup, toasted).
- Steps: Use coconut cookies for the crust base instead of graham crackers, fold half the toasted coconut into the filling mixture, bake according to standard directions, sprinkle remaining toasted coconut on top before serving.
3. Strawberry Mini Key Lime Pies

Fresh strawberries add sweetness and color to these tangy pies. This fruity version appeals to people who prefer less acidic desserts. Kids especially love the bright colors and familiar strawberry taste.
- Ingredients: Standard graham cracker crust, key lime filling, fresh strawberries (1 cup, pureed), sliced strawberries for garnish.
- Steps: Prepare the crust and filling as usual, swirl strawberry pieces into the filling before baking, bake at the same temperature and for the same time, and top with fresh strawberry slices when serving.
4. No-Bake Mini Key Lime Pies
Some situations call for desserts that don’t require turning on the oven. This version uses cream cheese and whipped cream for a mousse-like texture. The filling sets up firm in the fridge without any baking needed.
- Ingredients: Standard graham cracker crust (unbaked), cream cheese (8 oz, softened), sweetened condensed milk (14 oz), key lime juice (½ cup), whipped cream (1 cup).
- Steps: Press crust into muffin tins and chill for thirty minutes, beat cream cheese until fluffy, then add condensed milk and lime juice, fold in whipped cream gently until combined, spoon into crusts, and refrigerate for four hours.
5. Gingersnap Crust Mini Key Lime Pies
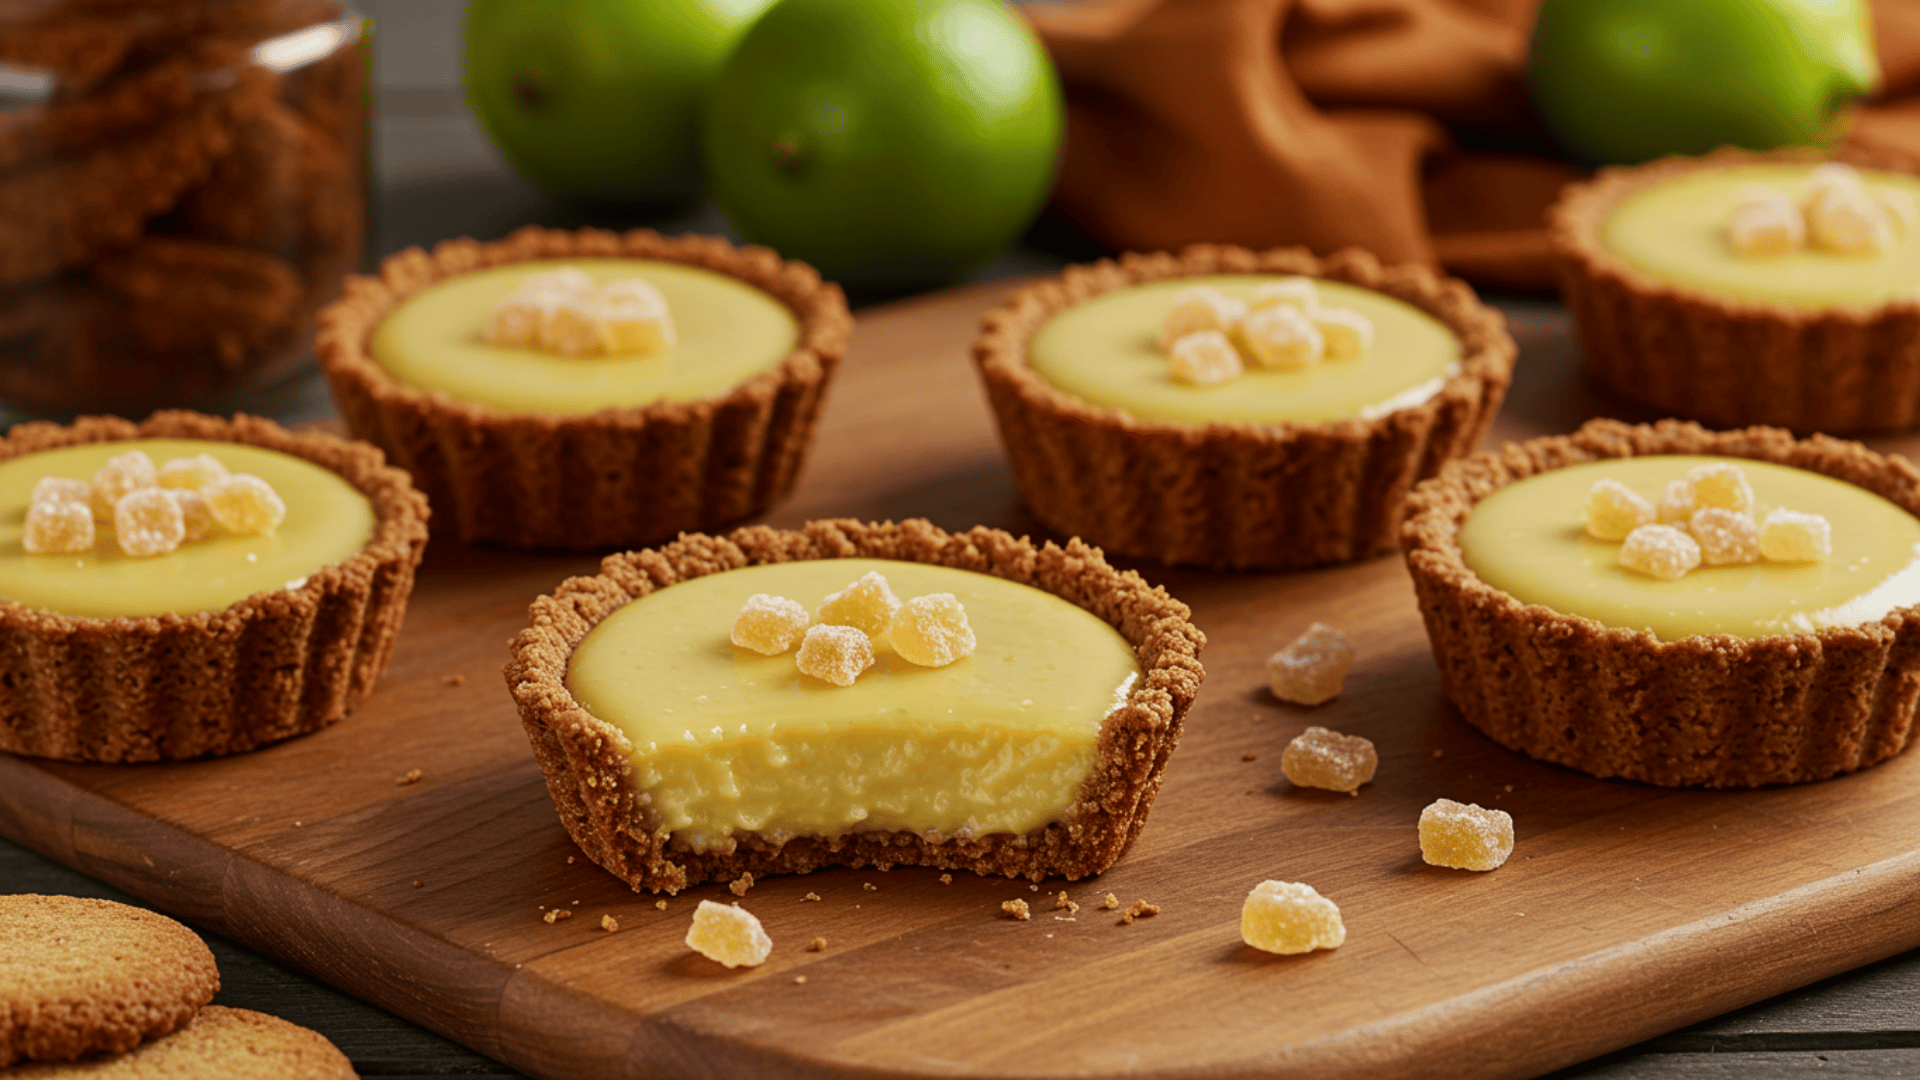
The spicy-sweet crust adds depth and complexity to each bite. This variation works wonderfully during the fall and winter months when people crave cozy flavors. The ginger doesn’t overpower but instead highlights the lime’s brightness.
- Ingredients: Gingersnap cookie crumbs (1½ cups), melted butter (5 tablespoons), standard key lime filling, candied ginger pieces (¼ cup, minced).
- Steps: Crush gingersnap cookies into fine crumbs and mix with melted butter, press into muffin tins and bake for five minutes, add candied ginger to the lime filling if desired, bake and chill following standard instructions.
These variations prove that mini key lime pies adapt easily to different tastes and occasions. Each version keeps that signature tangy flavor while offering something new.
Storage Tips
Mini key lime pies keep well when stored the right way, which makes them great for preparing ahead. A few simple storage habits help maintain their creamy filling, crisp crust, and fresh citrus flavor.
- Refrigerate promptly: Store the pies in an airtight container in the refrigerator within two hours of serving to keep the filling firm and safe to eat.
- Cover to prevent drying: Use plastic wrap or a sealed container so the pies don’t absorb fridge odors or dry out.
- Keep toppings fresh: If possible, add whipped cream right before serving. This helps the topping stay light and fluffy.
- Freezing option: Mini pies can be frozen without whipped cream for up to one month. Thaw overnight in the refrigerator before serving.
Nutritional Facts
These mini key lime pies offer a balance of creamy sweetness and tangy citrus flavor in every bite. The nutritional values below are estimated per serving, including the whipped cream topping.
| Nutrient | Amount per Serving (1 mini pie ~85 g) |
|---|---|
| Calories | ~240 kcal |
| Total Fat | 15 g |
| Saturated Fat | 9 g |
| Cholesterol | 80 mg |
| Sodium | 100 mg |
| Total Carbohydrates | 24 g |
| Sugars | 17 g |
| Protein | 4 g |
| Fiber | 0.5 g |
| Vitamin C | ~6% DV |
| Calcium | ~8% DV |
Note: Nutritional values are approximate and may vary depending on ingredient brands and the amount of whipped cream used.
Tips for Perfect Mini Key Lime Pies
Getting these desserts right takes a few insider tricks. Small details make the difference between okay pies and amazing ones. These tips help bakers avoid common mistakes and achieve professional results every time.
- Use real key lime juice when possible: Fresh key lime juice delivers a sharper, more original flavor than bottled versions, though bottled works fine in a pinch, just check that it’s 100% juice without added sugars or preservatives.
- Don’t skip the crust pre-baking step: Baking the empty crusts first prevents them from getting soggy when the filling goes in, creating that satisfying crunch that makes mini key lime pies so enjoyable to eat.
- Let ingredients reach room temperature: Cold eggs and condensed milk don’t mix as smoothly, resulting in a lumpy filling. Leaving everything out for thirty minutes before starting ensures a silky, smooth texture throughout.
- Avoid overbaking the filling: The centers should still jiggle slightly when removed from the oven because they continue cooking as they cool, and overbaked pies turn rubbery instead of creamy.
- Chill thoroughly before serving: Rushing the refrigeration time results in runny filling that doesn’t hold its shape. Patience pays off with firm, sliceable pies that look as good as they taste.
Final Thoughts
Making these tangy desserts at home doesn’t require professional baking skills or fancy equipment. Anyone with basic kitchen tools can create impressive results that guests will request again and again.
The beauty of mini key lime pies lies in their simplicity; straightforward ingredients come together quickly, and the small size means faster baking and easier serving.
Whether someone chooses the classic recipe or experiments with creative variations, success is practically guaranteed when following the steps outlined above.
Ready to start baking? Grab those ingredients, preheat the oven, and learn how simple it is to make restaurant-quality desserts right at home today.