

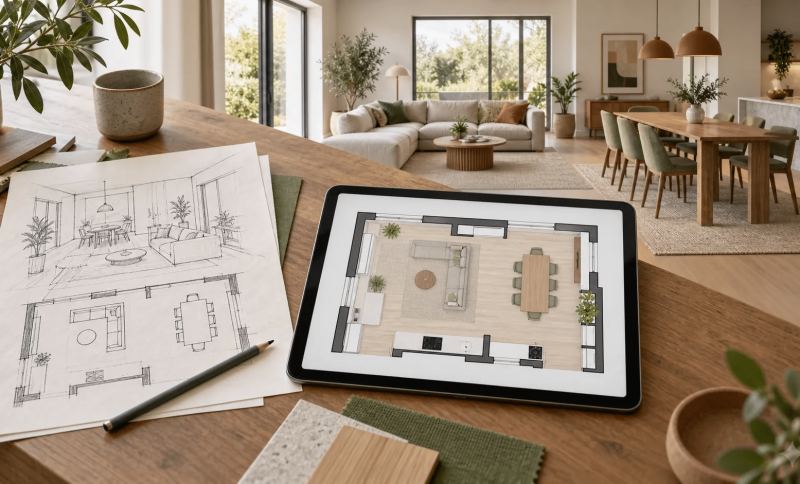
A Practical Visual Workflow for Planning a Home Renovation
Renovation ideas often begin as fragments: a larger kitchen, better storage, a home office, or a living room that feels easier to move through. The challenge is turning those preferences into something clear enough to evaluate before materials are ordered or construction begins.
Visual planning helps close that gap. A rough brief can become a layout, the layout can be checked against measurements, and the measured plan can become a three-dimensional space that is easier for everyone to understand. Each stage answers a different question, and using them in the right order prevents attractive images from being mistaken for verified plans.
This guide outlines a practical workflow for homeowners, interior designers, renovation teams, and property professionals who want to make early decisions with more confidence.
Start by Separating Facts From Preferences
Before drawing anything, divide the project information into three categories.
Facts are conditions supported by reliable evidence: measured wall lengths, door and window locations, fixed plumbing, columns, ceiling heights, and structural elements that cannot move without professional review.
Assumptions are details that appear likely but still need confirmation. A blurry dimension, an unclear wall thickness, or the position of a concealed service should remain visibly unresolved until it can be checked.
Preferences describe the result you want: an open kitchen, more daylight, a quieter bedroom, warmer materials, or a Scandinavian interior. Preferences are valuable, but they should not silently alter measured geometry.
Keeping these categories separate is one of the simplest ways to improve a design brief. It also makes later feedback more useful because reviewers can distinguish between a fixed constraint and a choice that is still open.
Explore More Than One Layout Direction
Early planning is the right time to compare possibilities. It is much cheaper to reject an awkward circulation route on screen than after cabinets, partitions, or furniture have been ordered.
If you have a written brief but no drawing, an AI floor plan generator can turn room counts, approximate dimensions, adjacencies, and circulation priorities into a visual starting point. For example, a brief might ask for a kitchen connected to dining, bedrooms separated from social areas, and a clear route from the entrance to the living room.
The first output should be treated as a proposal to inspect, not an answer to accept automatically. Compare several directions while keeping the same core requirements. Look for obvious conflicts: rooms that are too narrow, doors that collide, long routes between related spaces, or furniture zones that block natural movement.
At this stage, speed matters more than polish. The goal is to discover which arrangement deserves further work.
Turn the Preferred Idea Into a Measured 2D Plan
Once a promising direction emerges, translate it into a more deliberate drawing. This is where approximate ideas need to meet real dimensions.
An online floor plan creator is useful when you want direct control over walls, doors, windows, room labels, furniture symbols, and measurements. Starting from a blank canvas or an editable template, rebuild the selected layout using the best information available.
Check the overall dimensions first, then work inward. Confirm wall relationships, openings, circulation widths, and the space required for furniture or fixtures. If the source is a survey, PDF, sketch, or property listing plan, retain a copy beside the new drawing so changes can be traced.
A useful 2D plan should make the following information easy to review:
- The room boundaries and intended uses
- Door swings and principal walking routes
- Window positions and daylight orientation
- Fixed kitchens, bathrooms, columns, and services
- Key dimensions and at least one reliable scale reference
- Furniture footprints where clearance affects the layout
Do not force uncertain information to look precise. Mark missing dimensions or questionable wall positions for confirmation. A clean plan that identifies uncertainty is more trustworthy than a polished drawing built on guesses.
Use 3D to Review Space, Not Just Style
A plan communicates organization well, but many people find it difficult to imagine height, furniture scale, sightlines, and room volume from a top-down drawing. That is where a floor plan to 3D workflow becomes valuable.
The three-dimensional model should preserve the reviewed room shell while adding the elements needed for spatial evaluation. Walk through the main routes. Check whether doors open comfortably, dining chairs have enough pullback space, storage remains accessible, and large furniture feels proportionate to the room.
Only after the layout works should the review move to finishes, furniture character, and lighting. Keeping the geometry constant while testing visual options makes comparisons more meaningful. If every alternative changes both the room arrangement and the style, it becomes difficult to understand which decision actually improved the space.
3D is particularly helpful in collaborative projects. A homeowner, designer, contractor, and estimator can point to the same visible wall or object instead of relying on different mental pictures. Feedback becomes more specific: “Move this table away from the route to the balcony” is more actionable than “The room feels crowded.”
Review One Decision Layer at a Time
Trying to approve an entire room in one conversation often leads to vague feedback. A layered review produces clearer decisions.
1. Geometry and circulation
Confirm walls, openings, room relationships, and primary routes. Resolve any conflict that would affect construction or fixed cabinetry before discussing decoration.
2. Furniture fit and function
Use realistic furniture dimensions. Check clearances around beds, tables, sofas, wardrobes, appliances, and accessible routes. Consider how the room works during ordinary activities, not only how it looks from one camera angle.
3. Materials and color
Compare flooring, wall finishes, cabinetry, textiles, and major color relationships while the approved layout remains unchanged. Review materials in both daylight and artificial light when possible.
4. Lighting and atmosphere
Evaluate task lighting, ambient lighting, and focal lighting separately. A dramatic render can hide practical problems, so confirm that work surfaces, circulation zones, and storage areas are adequately lit.
5. Documentation and handoff
Record which version was selected, what remains undecided, and which assumptions need site verification. Keep the original measured source, the approved plan, and the latest visual model together so the project team is discussing the same version.
A Simple Pre Renovation Review Checklist
Before using a visual concept to guide purchasing, quoting, or construction conversations, ask:
- Does the plan match at least one reliable overall measurement?
- Are doors, windows, columns, stairs, and fixed services represented correctly?
- Are important walking routes and furniture clearances practical?
- Which elements are measured facts, and which are assumptions?
- Has the layout been reviewed before styling decisions were added?
- Are visual examples clearly presented as concepts rather than guarantees?
- Have structural, electrical, plumbing, accessibility, and code questions been assigned to qualified professionals?
- Is everyone reviewing the same saved version?
This checklist does not replace professional design or site verification. Its purpose is to make early visuals more useful and to expose questions while changes are still relatively inexpensive.
Common Mistakes to Avoid
One common mistake is treating the first generated layout as final. Early options are most valuable when they reveal possibilities and conflicts, not when they bypass review.
Another is polishing the interior before confirming the shell. Beautiful materials cannot repair incorrect dimensions or blocked circulation. Resolve geometry first, then add furniture, finishes, and lighting.
A third mistake is relying on a single view. A room can look convincing from one angle while hiding a tight doorway or unusable furniture clearance. Review the plan and multiple spatial viewpoints together.
Finally, do not let visual realism imply technical certainty. Render quality and spatial accuracy are different things. Any decision affecting structure, safety, permits, services, or construction cost needs appropriate measurements and professional verification.
Make the Next Decision More Concrete
A strong visual workflow does not try to automate every design decision. It gives each decision the right representation at the right time.
Use rapid concepts to explore alternatives. Use a measured 2D plan to establish the spatial facts. Use 3D to inspect scale, circulation, furniture, materials, and lighting. Then document what has been approved and what still needs expert review.
Moving from brief to plan to space in this order creates a clearer conversation between homeowners and professionals. It reduces avoidable misunderstandings, makes feedback more precise, and helps the team enter detailed design with a better shared understanding of the project.


